Solar Powered Aquaponics
May 29, 2022
Part 1: Initial Setup
Over the last year, I haven’t been eating fish in part due to the in-sustainability of commercial fishing and farming; however, I still want to eat fish that are raised in a more sustainable way, so I turned to aquaponics. Overfishing is still very prevalent despite the rise in farmed fish (Overfishing Data). Furthermore, commercial fishing gear makes up a substantial percentage of the waste in the ocean, around 10% (FAO Fisheries and Aquaculture Technical Paper No. 523).
While farmed fish may seem like a good alternative to wild-caught fish, many times farmed fish are fed wild-caught fish. This context inspired me to create my own aquaponics system.
Also, see initiatives by MarViva for marine governance — https://marviva.net/en/
A goal of this project is to try and raise fish and plants in a more sustainable way through aquaponics. Apart from raising fish, aquaponics is much more water-efficient than soil farming techniques and can produce greater yields per area. Some studies claim that aquaponics can achieve over 95% water efficiency compared to soil methods (Recirculating aquaculture systems). Another goal of the project is to document my findings and provide resources to anyone else who might be interested in setting up a similar system.
This pilot project will help me test and monitor different approaches and assess the sustainability of the system before I scale it up. Since this system will be completely standalone, I will be using solar to power all electronics. For detailed monitoring and assessment, I’m using a Raspberry Pi to control various sensors, and I’m sending the data to AWS. Once I have the data in AWS, I’ll serve it to an app where I can monitor the system’s performance, and I’ll be able to model the future performance with machine learning.
For the first part of this project, I set up and tested the key components of the system. The key components that need to be set up are the solar system, plumbing, and monitoring. For each of these components, I’ll provide instructions or links for their setup and links to where to buy the elements of each component.
Part 1 Scope
- Solar setup — Verify the solar setup can run the pump and Raspberry Pi
- Plumbing setup — Verify the plumbing setup can continuously fill and drain
- Monitoring setup — Verify that Raspberry Pi can run on the solar system and send data to the cloud db
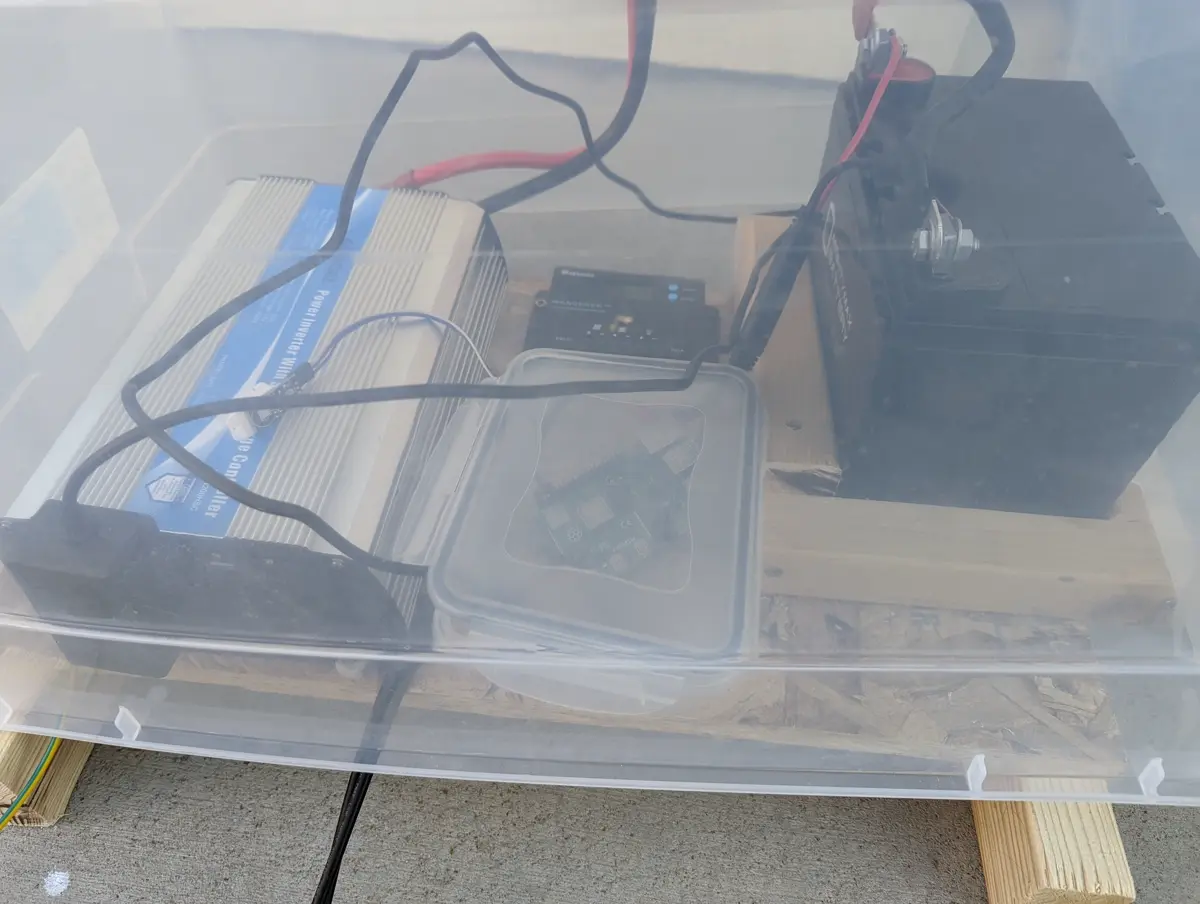
Solar Setup
For the solar setup, we will basically need to create a solar-powered outlet. The most difficult part of setting up this system is making sure all of the elements of the system are compatible with each other. As long as all of the components are compatible, it is just a matter of wiring everything together.
A diagram of my setup is shown below. At the bottom of this post, you can find all of the Amazon links to these components.
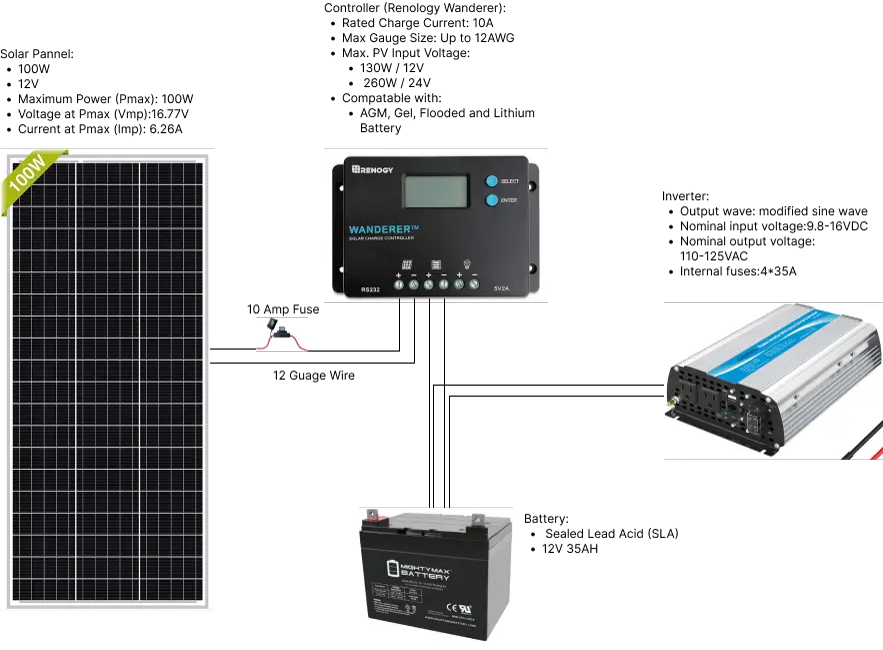
A note on wiring the components — Always make sure the battery is connected to the controller before connecting the solar panel. Always take care when handling electronics.
Main Elements
1. Solar panel
a. Provides system with power
b. As soon as the sun hits the panel it is live, so take necessary precautions
-
Solar controller
a. Makes sure the battery isn’t overcharged and provides other safety features -
Battery
a. Use a deep cycle battery (normal batteries only provide short bursts, deep cycle can provide steady power)
b. Store power for when the sun isn’t out (3 days is a good target) -
Fuse
a. Breaks the circuit if current goes over 10 Amps, protecting the controller
b. Manufacturer recommended -
12 gauge wire
a. Thick enough to transfer the needed power
Findings
1. Worked as expected
2. Waterproofing may be a challenge
3. The inverter and battery put off heat
4. Batteries will be the most expensive part
5. Next steps: look into panel and battery sizing to ensure the system runs a few days without sun
Plumbing Setup
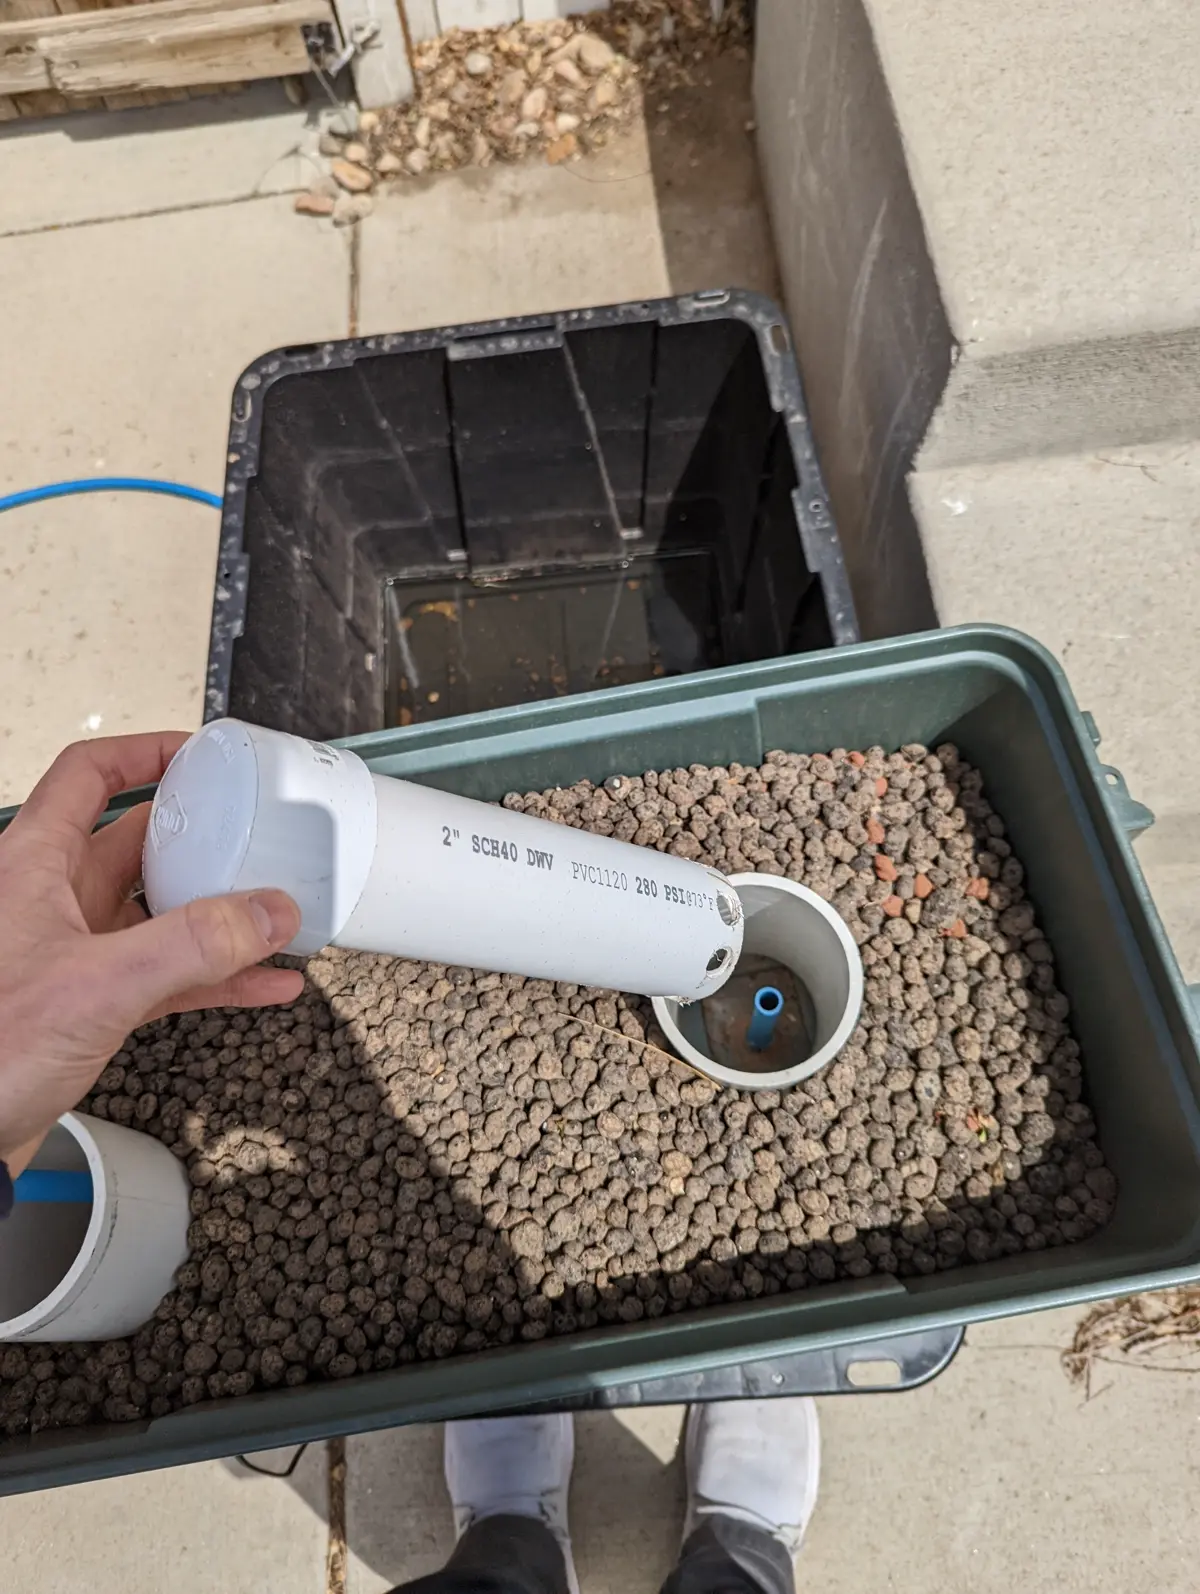
For the plumbing setup, we need to make the reservoir, grow bed, and bell siphon. The bell siphon will drain the grow bed once the water reaches a specific level. The pump moves the water up from the reservoir to the grow bed.

Main Elements
1. Bell Siphon
a. Drains the bed completely when water reaches a certain level
b. Trial and error to get it working properly
c. YouTube Setup Video
d. In-depth paper on bell siphons
-
Clay ball grow bed
a. Provides a medium for plants to grow
b. Must be inert for aquaponics so it doesn’t affect water quality/fish -
Pump
a. Water should be circulated 1–3 times/hour (e.g., 50 gallon system needs 50–150 gph pump)
b. My pump had too high of a flow rate, smaller would work fine
Findings
1. Had trouble getting the siphon to work, still troubleshooting
2. Debris built up quickly, will need covering and potentially a filter
Monitoring Setup
For the monitoring setup, I’ll use a Raspberry Pi with sensors to take measurements, and send/store them in AWS. This will let me monitor the system in real-time.
We’ll need to:
- Create a script to collect/send data
- Enable remote connection to Raspberry Pi
- Set up a serverless API + DB in AWS
Main Elements
1. Raspberry Pi 4 Setup
- Video Overview
- Collecting Data (DHT 22 Sensor)
- Use
Adafruit-circuitpython-dhtlibrary - Setup Video
-
Remote Connection (SSH)
- SSH Setup Guide
- Issue: Pi wouldn’t connect unless monitor was plugged in → reflashing OS fixed it
-
Ping the Pi’s IP to verify it’s online
-
Serverless API
- AWS API Setup with Python
- AWS API Setup with JavaScript
- Use API Gateway (MQTT preferred, will explore later)
Findings
- Raspberry Pi inconsistently sent data
- Unevenly spaced measurements in DB → possible Wi-Fi issues, needs further investigation
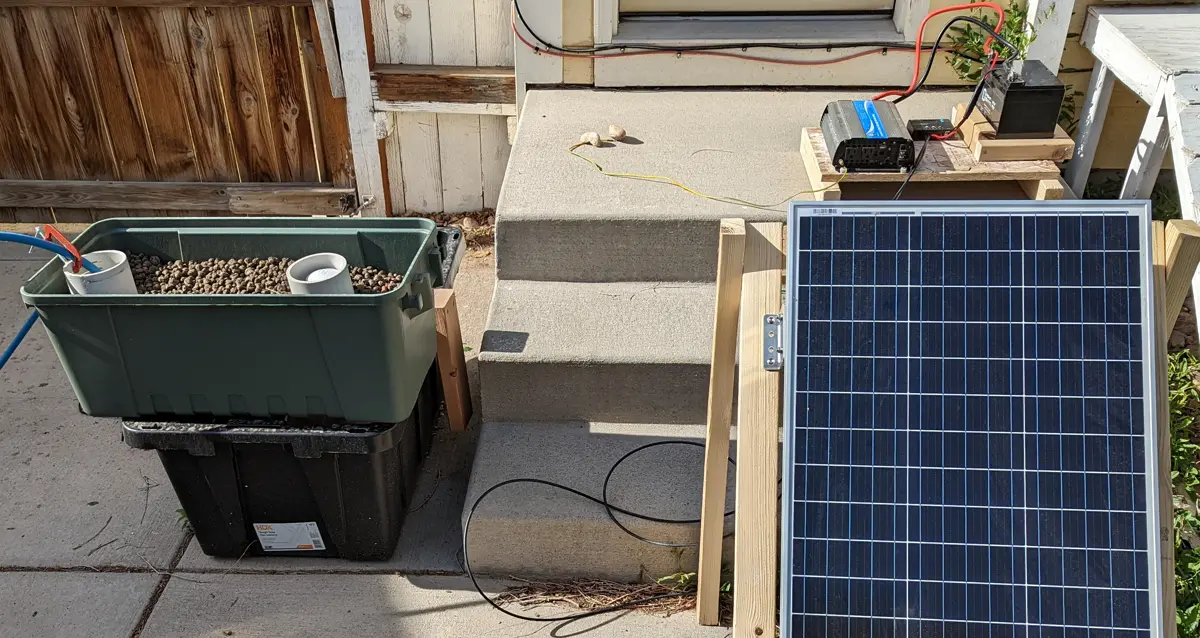
System Pictures

Product List
Solar
- Panel
- Panel Brackets
- Solar to wire connectors
- Controller
- Inverter
- Battery
- Fuse
- 12 Gauge quick disconnect
Plumbing
- Pump
- 55 gal reservoir tote
- 68 Qt media bed tote
- Bulkhead fitting
- ¾ in PVC adaptor
- Clay Pebbles
- PVC — ¾ in, 4 in, 2 in
- PEX — ½ in (recommend PVC/tubing instead unless you’re familiar)
- Ball valve (to control flow to media bed)
Monitoring
- Raspberry Pi Kit
- DHT 22 Sensor
Further Future Improvements
Solar
- Add additional batteries
- Improve waterproofing
Plumbing
- Improve bell siphon
Monitoring
- Add additional sensors
- Investigate API inconsistencies
- Heat sink for Raspberry Pi (very hot after 12 hrs outside)
- Independent power supply