Snowflake Native Apps Simple CI CD for ML Apps
Sep 8, 2023

Snowflake native apps allow you to develop applications directly on your data in your Snowflake cloud. With native apps, you can build out apps that can go above and beyond what traditional BI tools can do all while maintaining Snowflake’s high standard of security. Since native apps are still in their early stages (still in private preview at this time), there is no standard way of automating development processes with continuous integration and continuous delivery (CI/CD). CI/CD is at the core of modern DevOps and agile app development and will need to be implemented for any non-trivial use case. In this article, I’ll go over the simple CI/CD strategy I used for deploying Snowflake native apps and provide the associated code for both the app and CI/CD process.
For this CI/CD setup, I focused on using models in Sreamlit with a Snowflake native app. For a fully-fledged ML app, there are many more components that need to be taken into consideration with CI/CD, but lots of good reference material already exists for the upstream MLOps.
Goals for this CI/CD implementation:
- Deploy a ML model in a native app and access the model using Streamlit
- Automate SQL execution so I don’t need to run any individual SQL statements by hand
- Seamlessly move between local, dev, and prod environments
- Continuous deployment with Github actions integration
All the code for this project is on my github: https://github.com/PrestonBlackburn/snowflake-native-apps-ci-cd
Overview
Before we can get the CI/CD automation, we will need to generate a model object and Snowflake UDF that will be used to make the predictions. In a real setup, this would happen in a separate MLOps pipeline, but to keep things simple we will build and train a single model using Snowpark stored procs. This leverages Snowflake compute for model training and will produce the model that we will use for predictions.
Once the model is ready to go we can begin the application development. For our local testing setup, we want to host Streamlit locally and call the Snowflake UDF and tables that we have created. As long as the UDFs and model are available in a Snowflake stage, local testing is straightforward. It is the same flow as creating a Snowflake Streamlit app. This is well documented here
Deploying Snowflake native apps requires a series of SQL scripts to be run and for certain parameters to be defined in a yaml file. Running the SQL scripts will be automated and templatized through Python scripting. This enables us to easily alter the script if we want to deploy into a dev environment vs a prod environment. Github actions can then be used to call the deployment script that handles all of the deployment to Snowflake in one place, greatly simplifying the pipeline.
High-level CI/CD architecture

Along with the CI/CD architecture we also need to define our workflow for testing locally and then deploying the app. Since native apps are still very new, there aren’t many examples of this out in the wild. Two main concepts Snowflake introduced for native applications are the application package and the application. These are essentially just special types of Snowflake databases. For this workflow, we’ll use three databases, one for testing our local streamlit app, one for the application package, and one for the application itself. Below is the workflow I used for the whole process from model creation to deploying Streamlit on Snowflake.
Workflow Overview
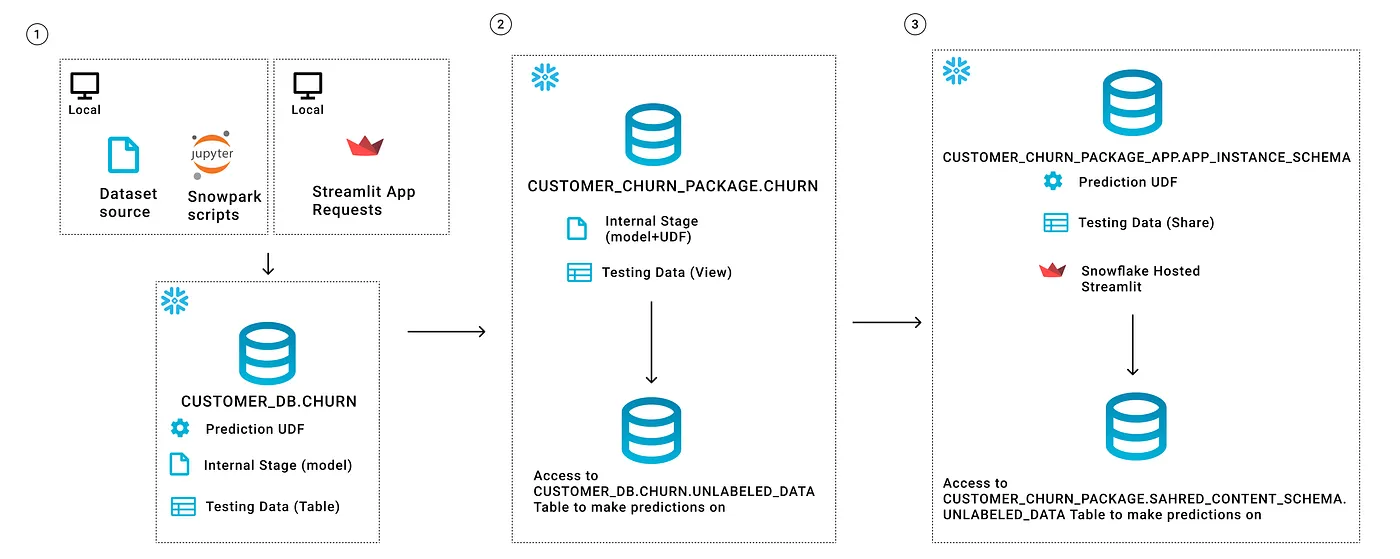
High-Level Workflow Steps
- Setup and Local Testing
First, we need to load the training data to Snowflake, so we can use it for training. The data also should be split into a labeled and unlabeled dataset that will be used to make predictions later on
Then create and test the prediction model using Snowpark in a Jupyter notebook
Save the model object to a Snowflake Stage
Create and test a UDF for testing predictions with the saved model
Create a Streamlit app that references the Snowflake objects and uses the UDF to make predictions
- App Packaging
Create the necessary source files for the package, depending on the target deployment environment.
Update the setup.sql script that defines how the application is created
Run the deploy.py file to upload local files to the Snowflake package
Run any tests
- App Deployment
After the model is packaged we just need to run the create application SQL statements to generate the app
The key piece in this workflow is the deploy.py file that I created to make the automation process easier. It automatically handles looking in the src folder and pushing those files to the application package stage. It also uses a to_stage.yml config file to template out some SQL parameters. This makes it easier to switch between the dev and prod deployments of the app depending on the environment.
Since there is a single entry point to the app from the deploy.py file, I’m able to easily set up a Github actions workflow that will trigger when changes are pushed to the dev or prod branch and initiate the appropriate workflow.
Hands-on Deployment Flow
This assumes the initial objects have already been created with the Jupyter notebooks provided in GitHub and you have already cloned the GitHub repo.
Local Testing + Updating Project:
- install dependencies
pip install -r requirements.txt
- Update the following files with your information
- app/deploy/to_stage.yml  <- key deployment variables to update (used in deploy.py)
- src/*                    <- this is where you will build out your own app
- sf_account.config        <- your snowflake credentials used for creating the app
- Manually test deploying to dev and prod with the deploy.py script
python app/deploy/deploy.py --env dev
python app/deploy/deploy.py --env prod
Deployment Flow With CI/CD:
Again make sure the app files are updated with your information
- app/deploy/to_stage.yml  <- key deployment variables to update (used in deploy.py)
- src/*                    <- this is where you will build out your own app
- sf_account.config        <- your snowflake credentials used for creating the app
- Convert your sf_account.config file to a base64 string so it can be uploaded to GitHub actions secrets
(if on Linux)
cat sf_account.config | base64
Example results: W0RFRkFVTFRdDQphY2NvdW50PWdqemtqb2stdGo1NDkxOA0KdXN
-
Upload the secrets string as a secret on GitHub. Make sure the secret name lines up with the github actions workflow deploy.yml file.
-
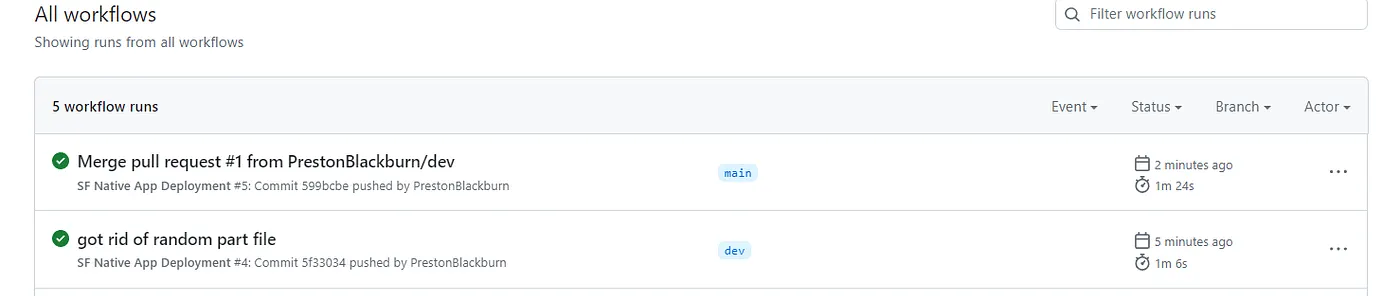
Push changes to the dev or main branch to trigger the automated deployment.
Example after the workflow has run:
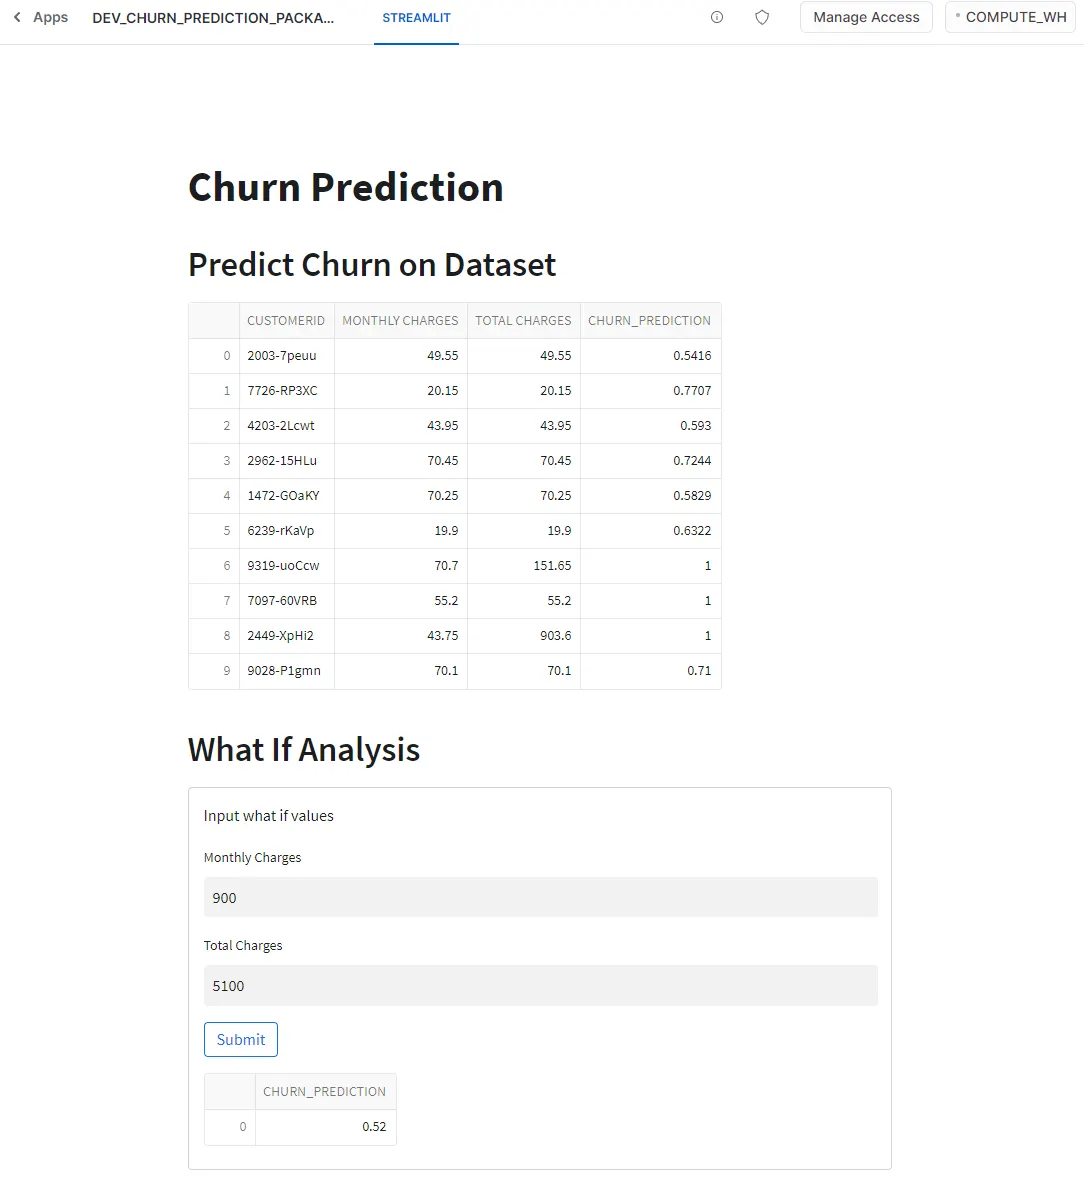
About the App
For this app, I trained a model that can be used on formatted customer data to predict churn. By itself, this doesn’t warrant a native app, so I added an interactive what-if analysis to help end users understand the model. The what-if analysis allows a user to manually enter values and see what the model returns for those values. It would be more difficult to have this sort of interactivity with a traditional BI tool.
The App UI
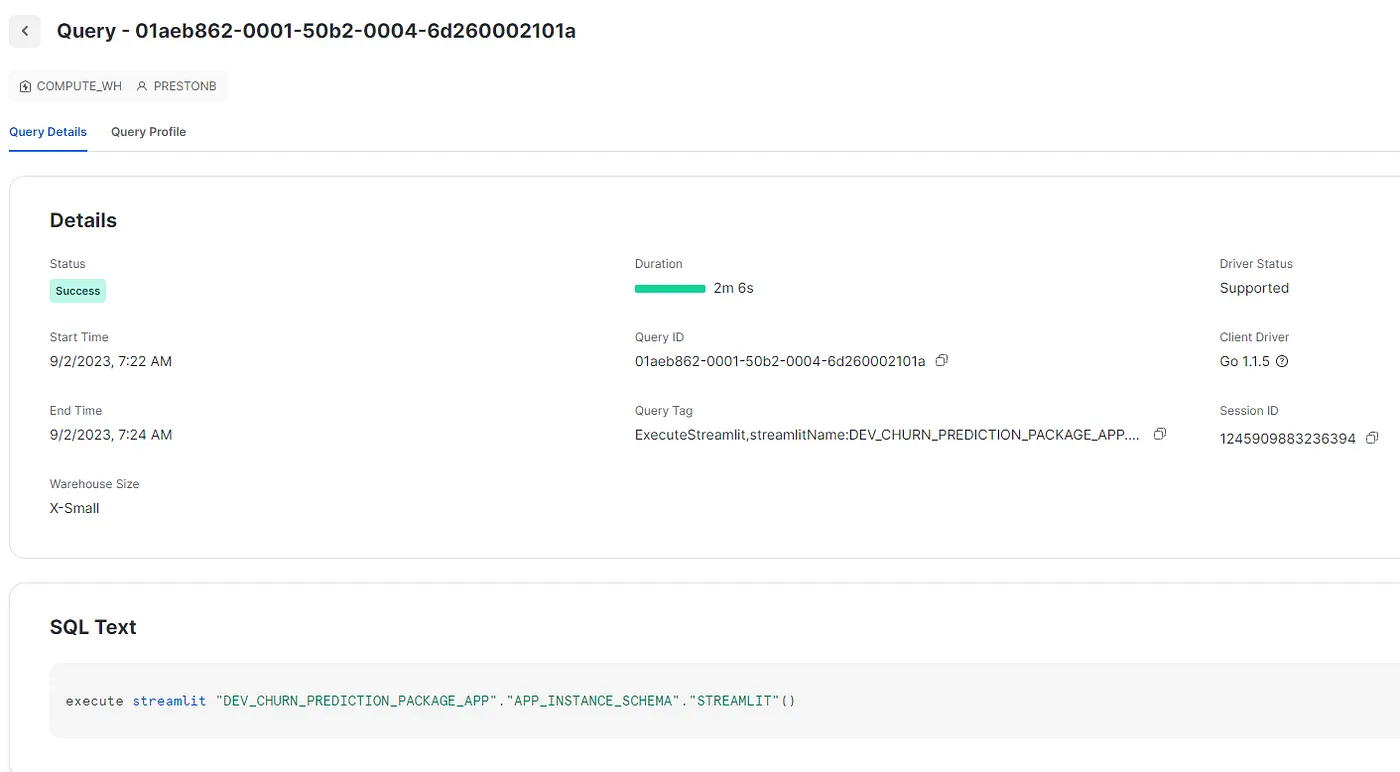
Apps Running in Production on Snowflake

Example of the app running on an extra small warehouse
Conclusion
This workflow is meant to be a starting point that anyone can clone and build on or alter. As we get more familiar with native apps and native apps mature over time this deployment process will most likely become much easier, but for now it can be hard to manage all of the different components without supporting scripts.