Recommendation Systems With TensorFlow Recommenders Pt 2
Dec 1, 2021
Part 2: Pipeline Development and Automation
In part one of this series, we went over how to create retrieval and ranking models with TensorFlow Recommenders to make beer recommendations. We also uploaded the models we created to SageMaker then set up model endpoints, so the models could be accessed by an API. This was a good start, but if we want to scale up the model, we run into a couple of issues with model re-training and limited compute resources. In this post I’ll walkthrough how to set up a SageMaker Pipeline for the retrieval and ranking models we used in part 1 then automatically trigger the pipelines every week to handle new data. Pipelines will allow us to automate model re-training and access more compute resources than we could on a local machine.
All of the code for this project is on my GitHub: Github Notebooks
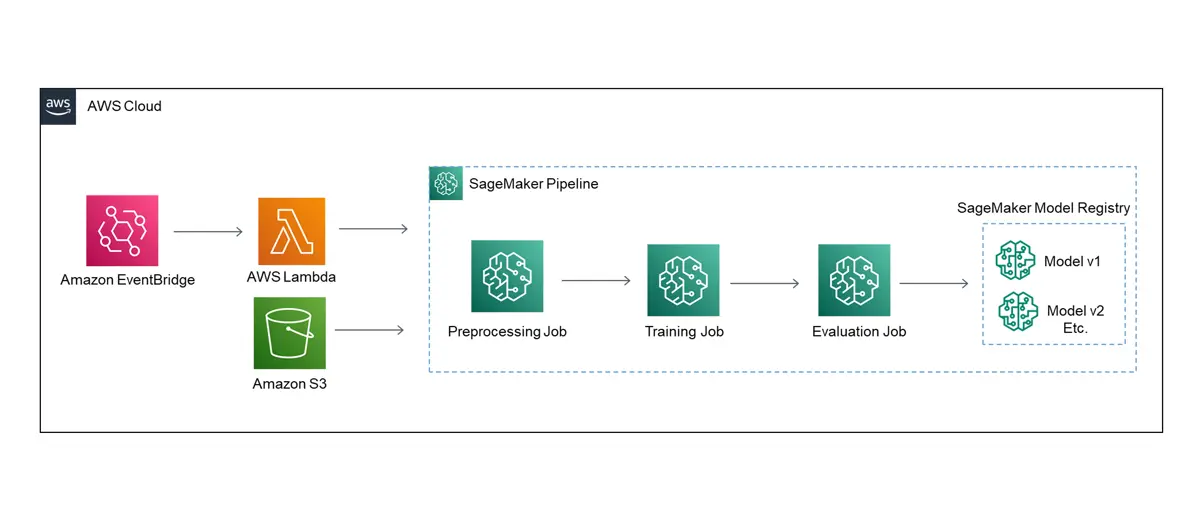
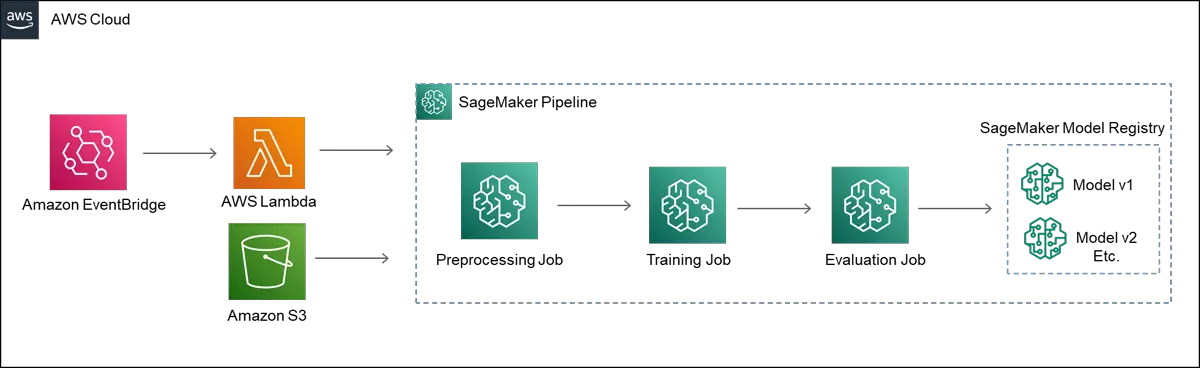
The architecture diagram for the pipeline auto-deployment is shown below.
SageMaker Pipelines
First off, SageMaker Pipelines are just one option that can be used to tackle this problem. Other AWS tools or third-party tools such as Apache Airflow, AWS Step Functions, or Kubeflow could also be used. I started out looking at Step Functions, but finally settled on using Pipelines. SageMaker Pipelines integrate nicely with some out of the box AWS MLOps tools that I will explore in future posts.
The main components of SageMaker Pipelines are SageMaker Jobs. There are three main types of jobs in SageMaker- Processing jobs,
training jobs, and inference jobs. Processing jobs can be used for both training and evaluation. A couple examples of a training
job are model training jobs and hyperparameter tuning jobs. Specific instance types can be specified for each job. This allows us
to execute a task like preprocessing on a smaller instance and use a larger instance with a GPU for model training.
In our case we’ll use these jobs with custom scripts to be executed.
AWS has some extensive documentation for SageMaker, and I would highly recommend reading through the developer guide:
AWS SageMaker Dev Guide
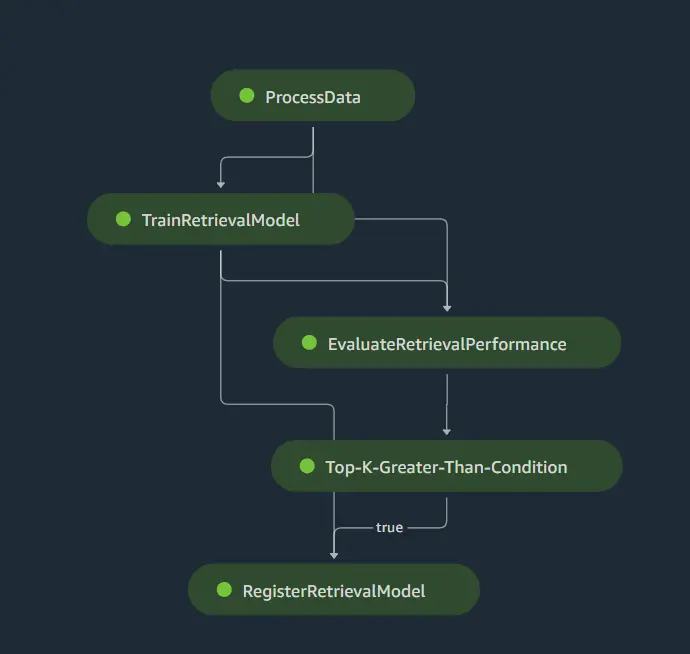
Retrieval Pipeline Overview
SageMaker Pipelines have a nice built in DAG (directed acyclic graph) that will allow us to view our pipeline steps and execution statuses. Once the pipeline is created the DAG will automatically be generated. For the pipeline we will process the initial data, train the models, evaluate the model performance, and save the model to the model registry.
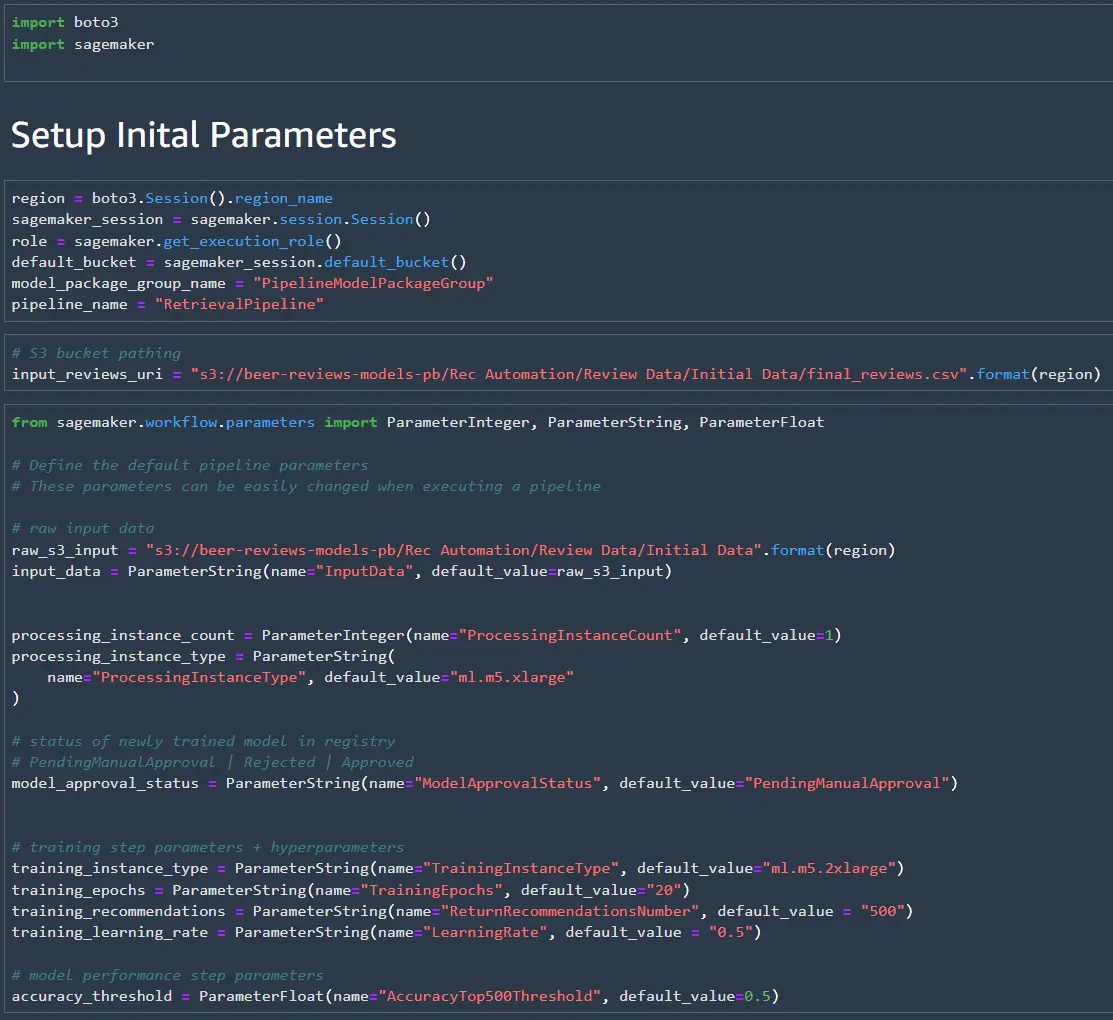
Retrieval Pipeline Walkthrough
To start we can define some initial parameters that can be easily changed when we execute the pipeline. If you need to execute the pipeline again the parameters defined here can be changed in the SageMaker Pipeline GUI, or using Boto3 (for deployment through Lambda).
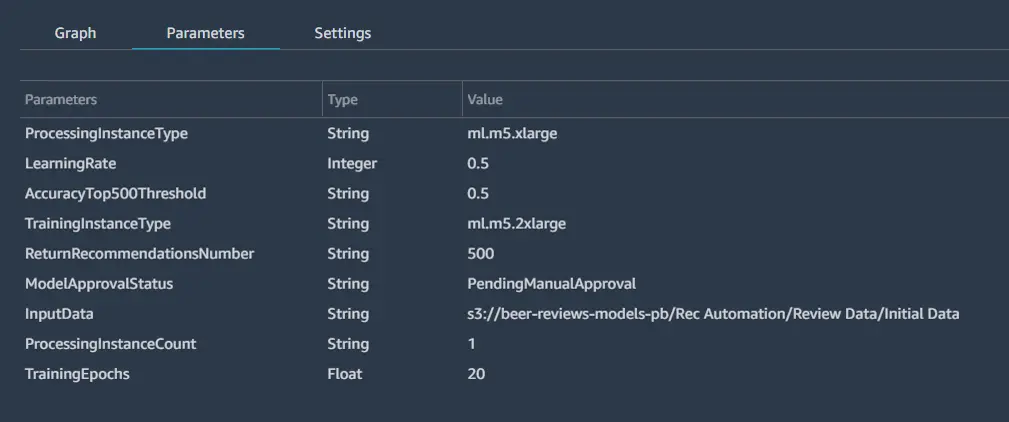
Parameters will show up in the parameters section of the pipeline in the SageMaker studio GUI as shown below.
Next, we’ll need to write a script for the preprocessing job. In scripts for SageMaker jobs it is important to
remember SageMaker is looking for particular file paths in the docker container that need to be specified.
In the preprocessing job the path is /opt/ml/processing. The script can be saved in the current directory
using the writefile command.
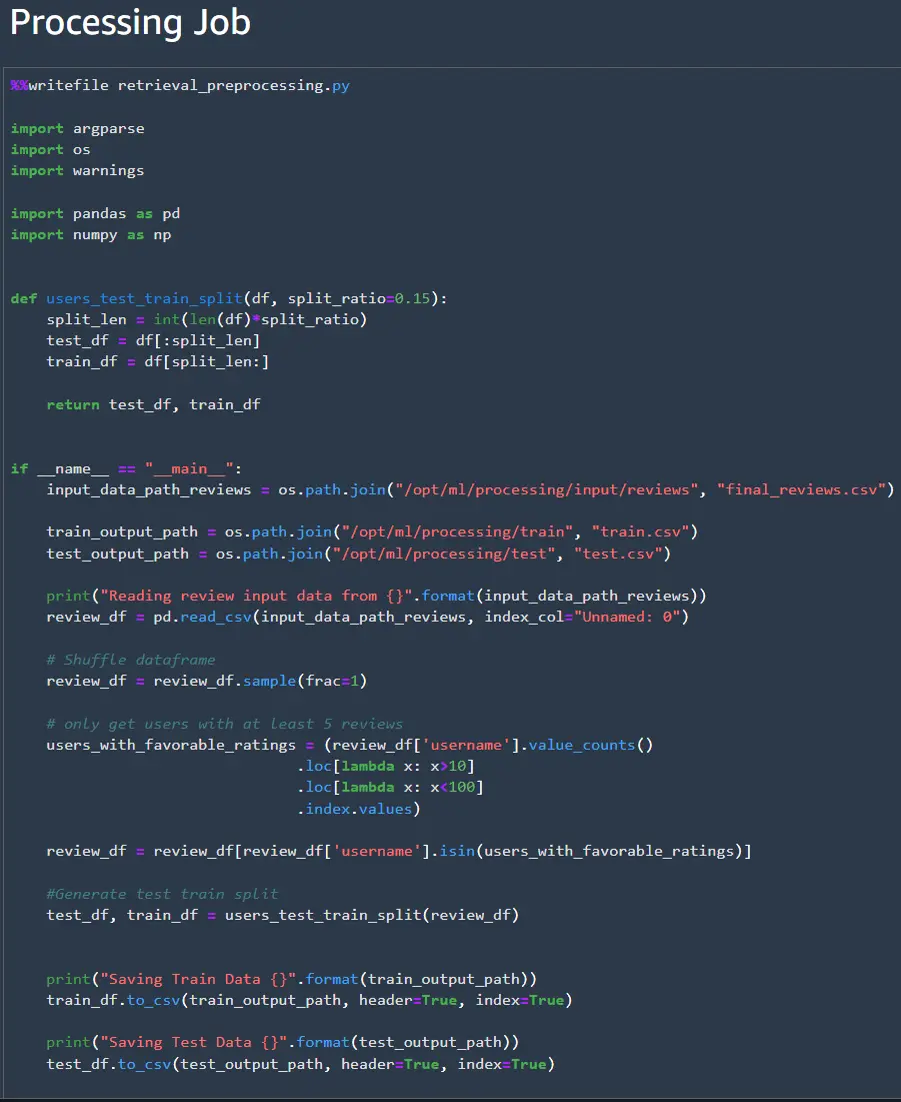
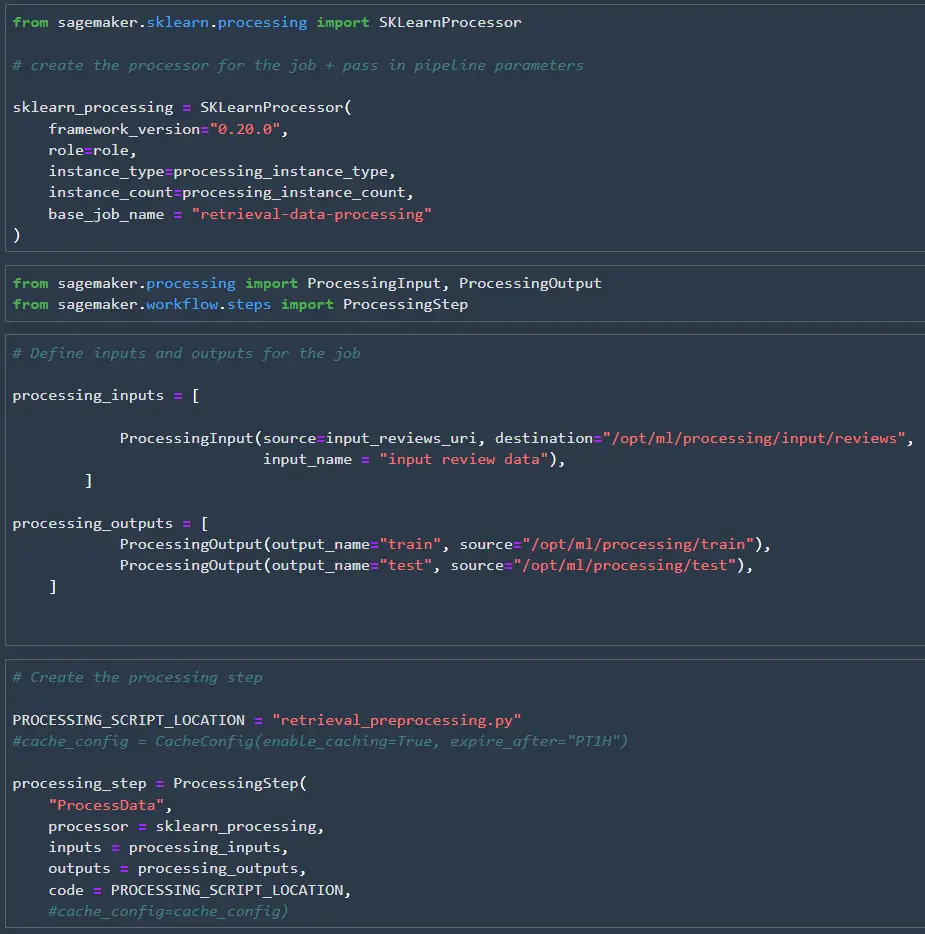
Once the processing script is created, we need to set up the processor that will execute the processing job and create the processing step. We’ll pass the pipeline parameters that we specified earlier to the processor so they can be easily modified later. This might be useful if we are expecting the input data size to grow over time so we can increase the instance size later if needed.
After the processor is defined, we can set up the inputs, outputs, and processing step. We need to connect the processing job’s inputs and outputs to the docker container’s inputs and outputs, so SageMaker knows where to pass the data. The processor, inputs, outputs, and code can then be wrapped up in a processing step that we’ll use to create our pipeline at the end of this notebook.
After waiting around for multiple jobs to complete in pipeline executions during testing I found out that you can enable caching of pipeline steps. If you enable caching the pipeline steps don’t need to be re-ran and can be set to expire after a set amount of time. I probably could have saved several hours of testing time if I had known about this trick earlier.
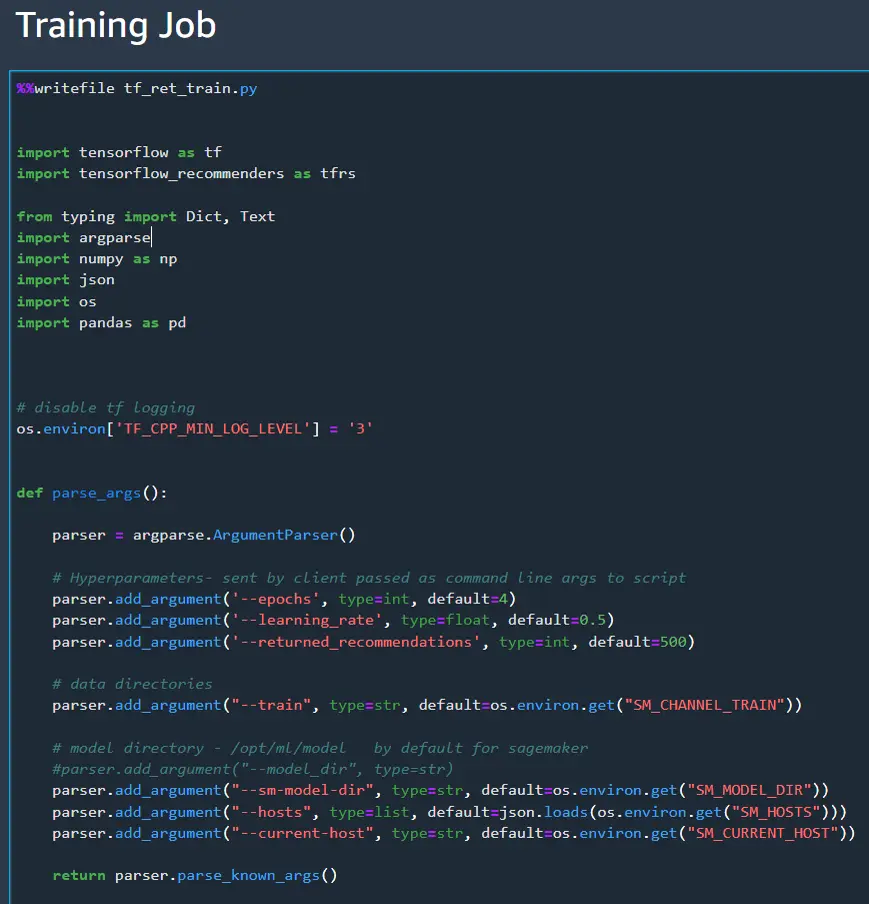
Now we can move on to creating the training job script. Most of this section will look familiar to retrieval
model that we created in part 1 of this series. This script is really long, so I’ll post the whole notebook
on GitHub and only cover the major differences here. The main difference is that all the inputs and outputs
need be passed as arguments using the ArgumentParser(). Remember where the model is saved since we’ll need
that to call the model for the eval job. In this case I saved the model to the directory 01.
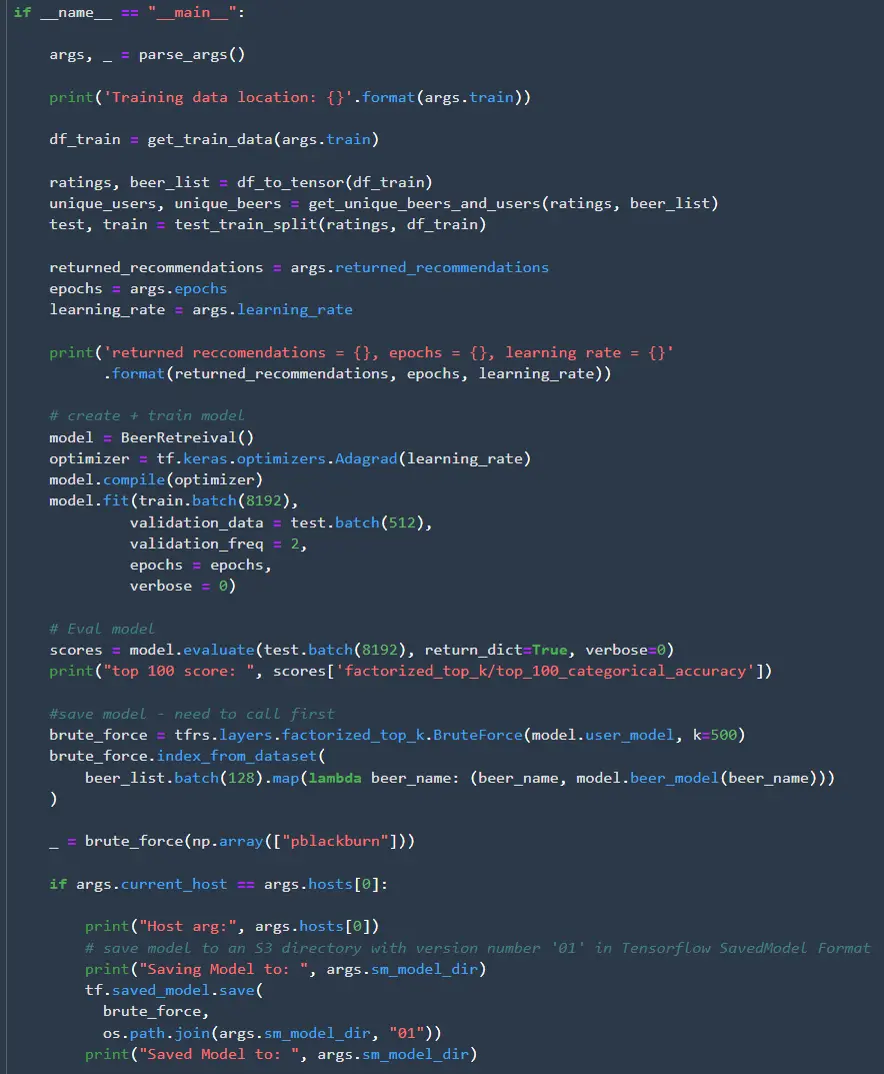
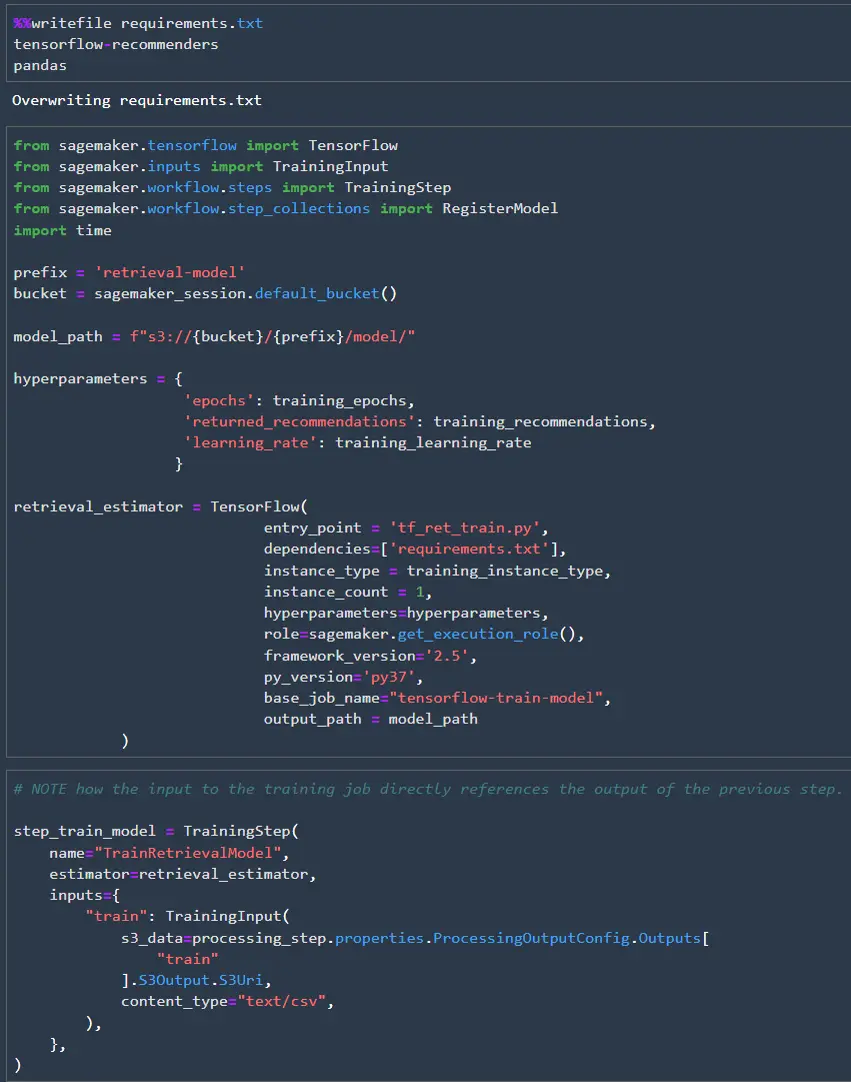
Since we are using TensorFlow Recommenders, we can’t use the out of the box TensorFlow image to run the training job. Luckily it is easy to add TensorFlow Recommenders to the TensorFlow image, so there is no need for us to create a container from scratch. All we need to do is create a requirements.txt file then add it as a dependency for the estimator. Once the estimator is defined, we can create the training step. The training step references the “train” output from the earlier processing step.
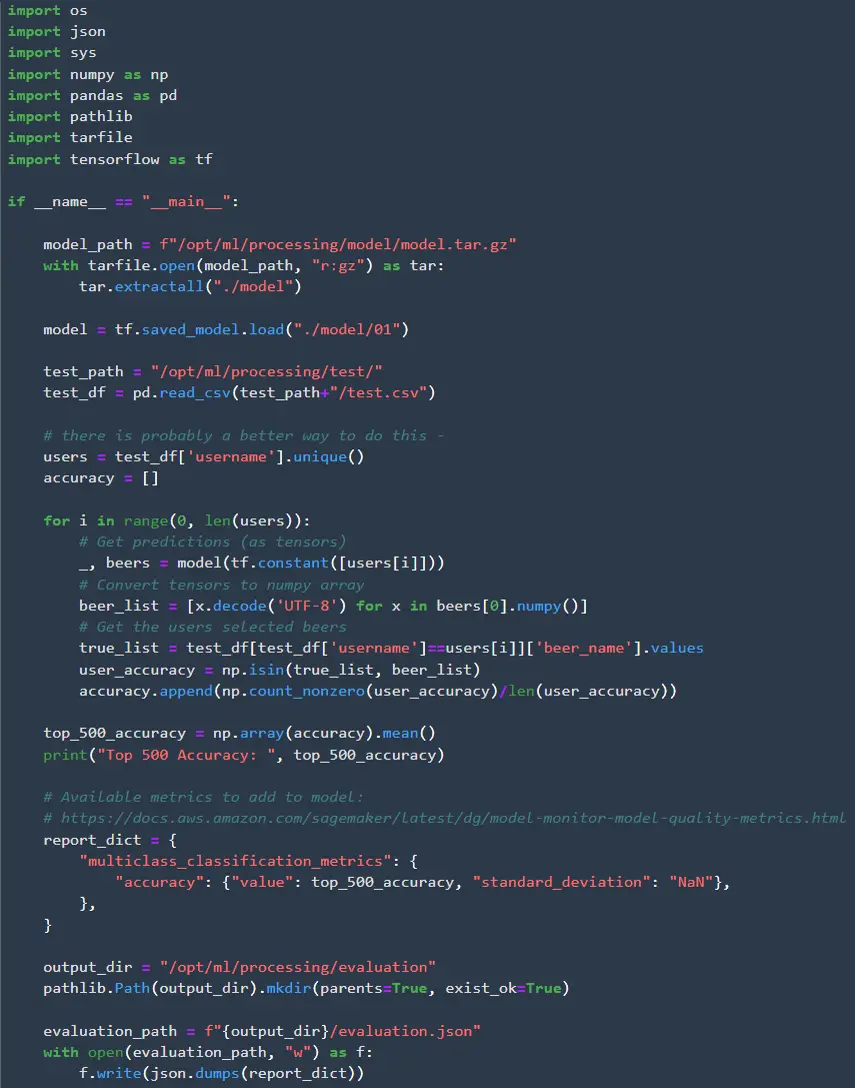
The final job will be the validation step to make sure the model achieves the desired degree of accuracy. Since we are retrieving 500 recommendations I check the top-500 accuracy. There are two additional pieces we need in the validation step that we didn’t need in the preprocessing step. First we need to access the model we just trained. SageMaker saves models in mode.tar.gz format, so we need to extract the model before we can load it. The second piece is that we need to save the model results in json format, so they can be read later. This json file needs to follow a predetermined format specified by AWS.
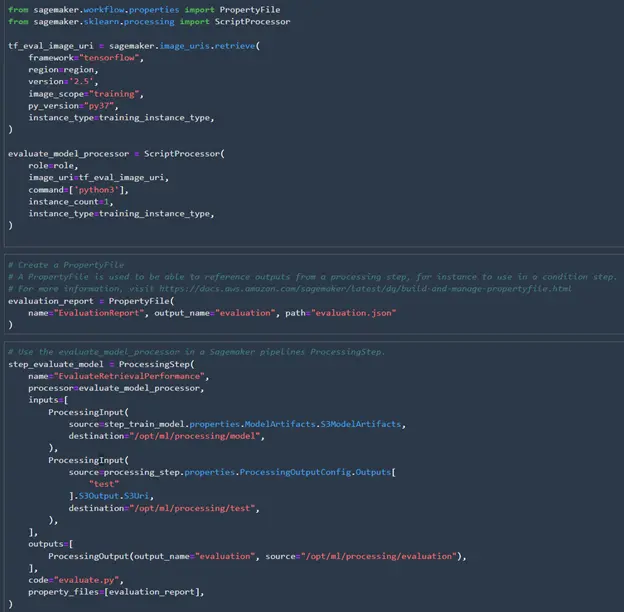
Now that the validation script is created, we can create the processor and processing step like we did for preprocessing. There are a couple of differences here as well. Instead of using the SKLearnProcessor we need to get the TensorFlow image to use for validating the model. This time we don’t need to add TensorFlow Recommenders as a dependency because we have already saved the model. Once the TensorFlow model is saved it works just like any other TensorFlow model. To evaluate the performance we need to create a property file for SageMaker to read the top-500 accuracy score. The property file can then be included in the processing step.
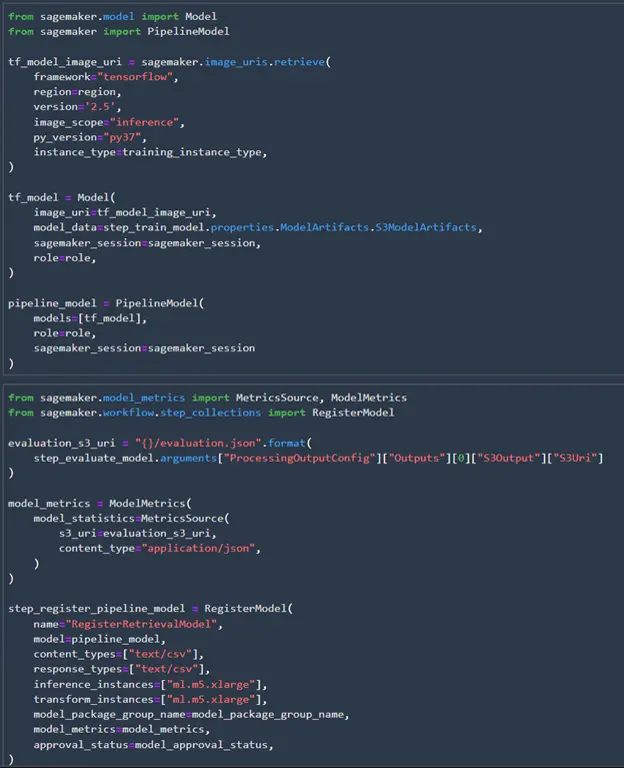
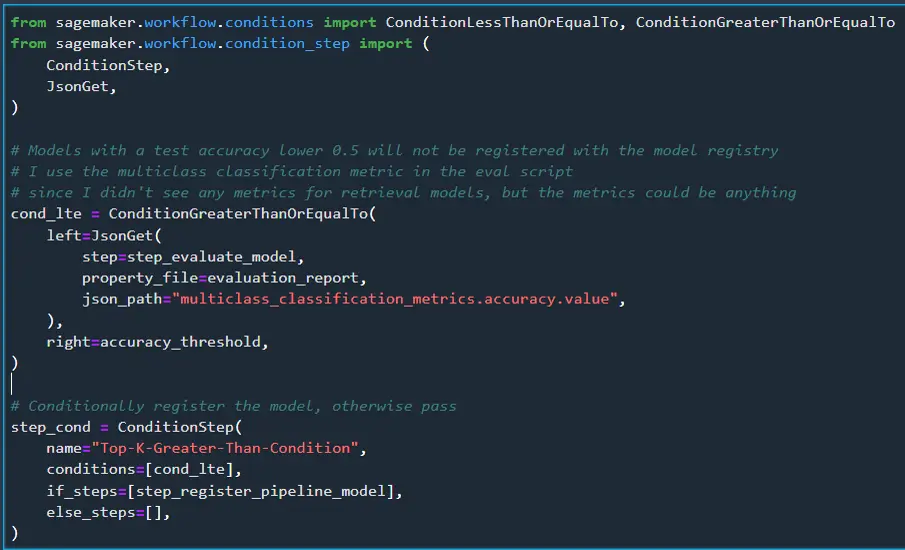
All the SageMaker scripts and jobs are complete! Now we need to register the model. Registering the model makes it easy to access to create endpoints, and it makes it easy to track the history of the models. After the pipeline runs and the model is registered the model package group will show up in the SageMaker model registry. We’ll also show the model accuracy in the registry by adding the model metrics from the validation json file.
We’ll also add a condition step to check the accuracy of the model. If it is under 0.5 we won’t register the model.
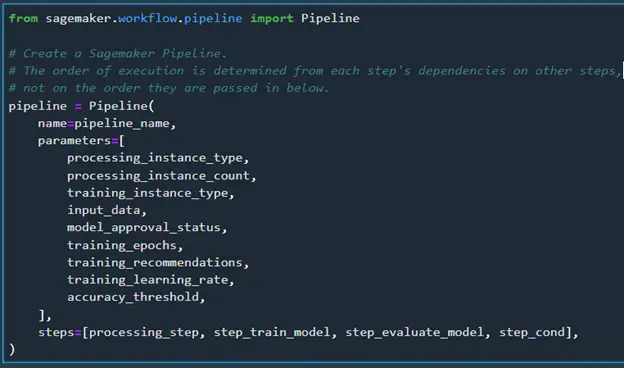
All the steps have been defined, so we can define the full pipeline now. We’ll need to add all the parameters and steps we specified. The pipeline is created based on the dependencies of the steps and not how they are passed in below. When I first setup the pipeline I was saving all the data directly to S3 after the processing step instead of passing it to the training step. Since nothing was linking the processing step and training step, they both executed at the same time until I pointed the input for the training step to the output of the processing step.
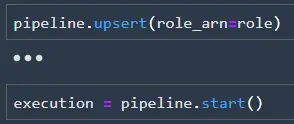
Now that the pipeline is defined, we can create it (or update it) using upsert and run the pipeline using start.
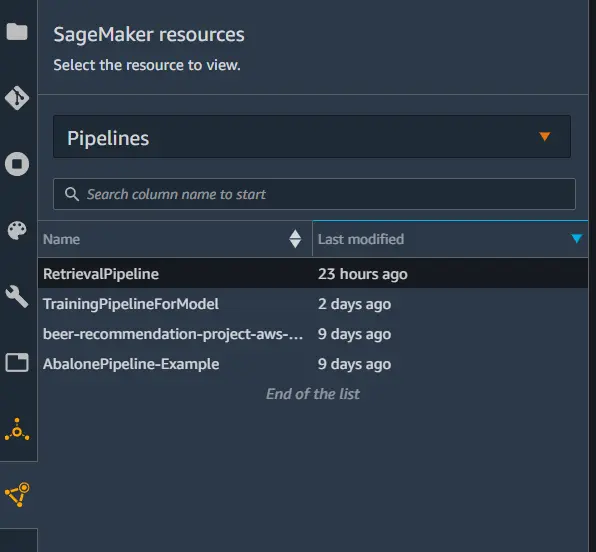
We can check on the status of the pipeline by going to pipelines in the SageMaker Resources tab. Each step in the pipeline will have a status that can be tracked as the pipeline executes.
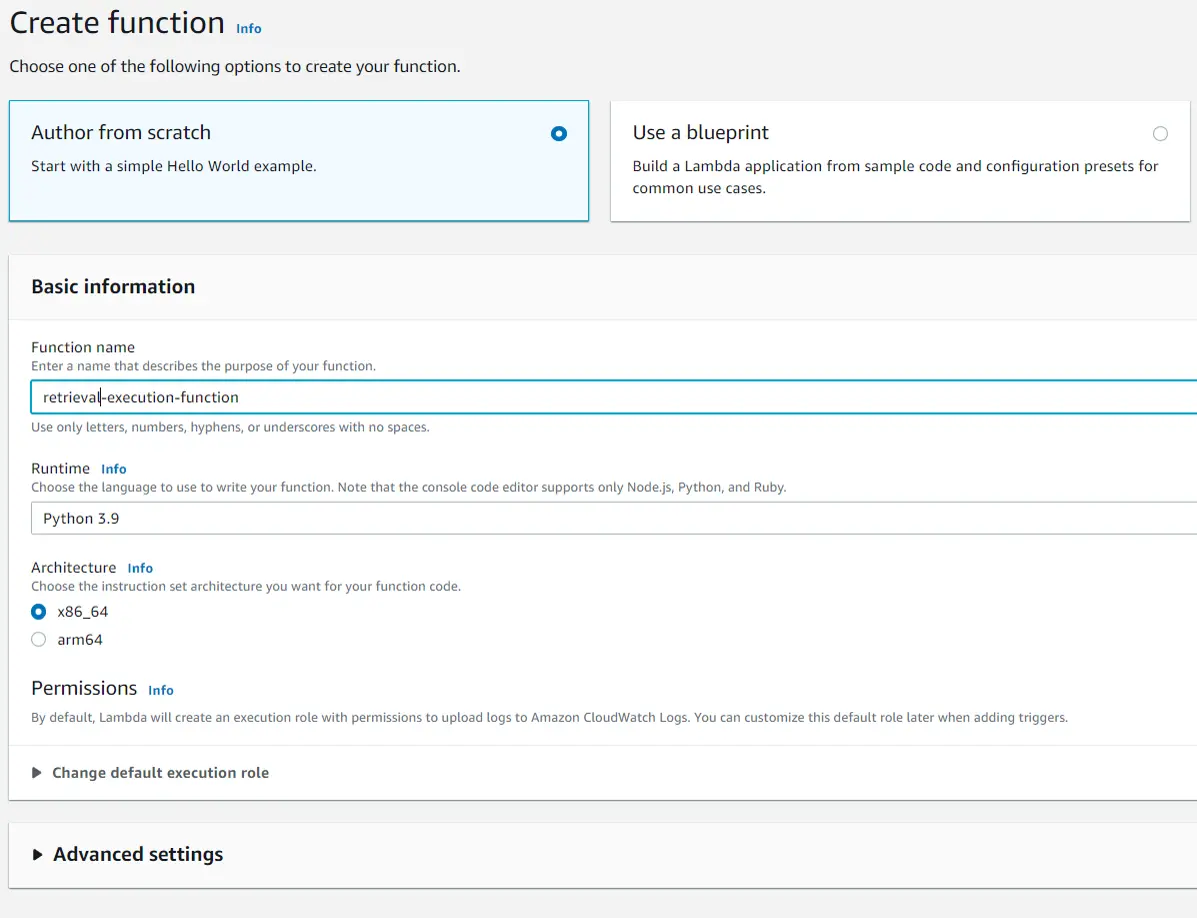
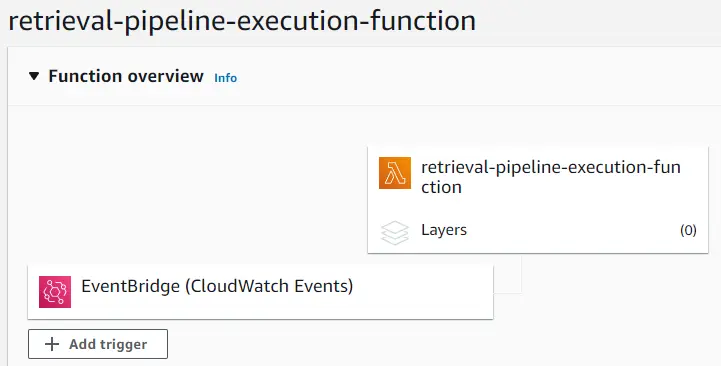
Finally, we can automate re-running the pipeline using EventBridge and Lambda. First create a lambda function with a python runtime.
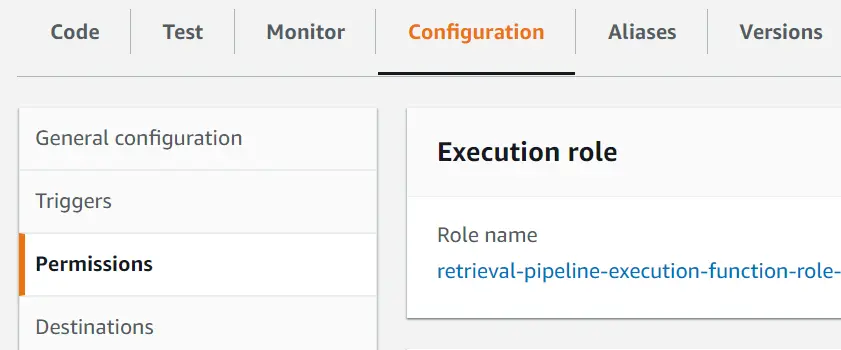
After the lambda function is created, we will need to give it permissions to use SageMaker resources. The easiest way to do this is by attaching SageMaker policies to the lambda function’s role. To do this go to the configuration and permissions tab in the lambda function and select the execution role for the lambda function.
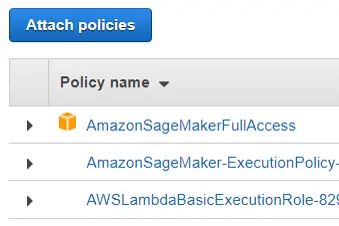
Then add the SageMaker full access policy and the SageMaker execution policy to the lambda function role. This allows the Lambda function to do anything that SageMaker can, so use it with caution.
Next go back to the code tab and add the code to execute the SageMaker pipeline. The start_pipeline_execution function is all you need, and you can even modify any of the parameters that we specified at the very beginning of this post. I also return the response of the execution, but it is just as easy to go back over to SageMaker Studio and view the pipeline.

Scheduling an execution is simple with EventBridge. Just add a trigger for the lambda function and select EventBridge.
Specify a trigger configuration to your liking and add it.
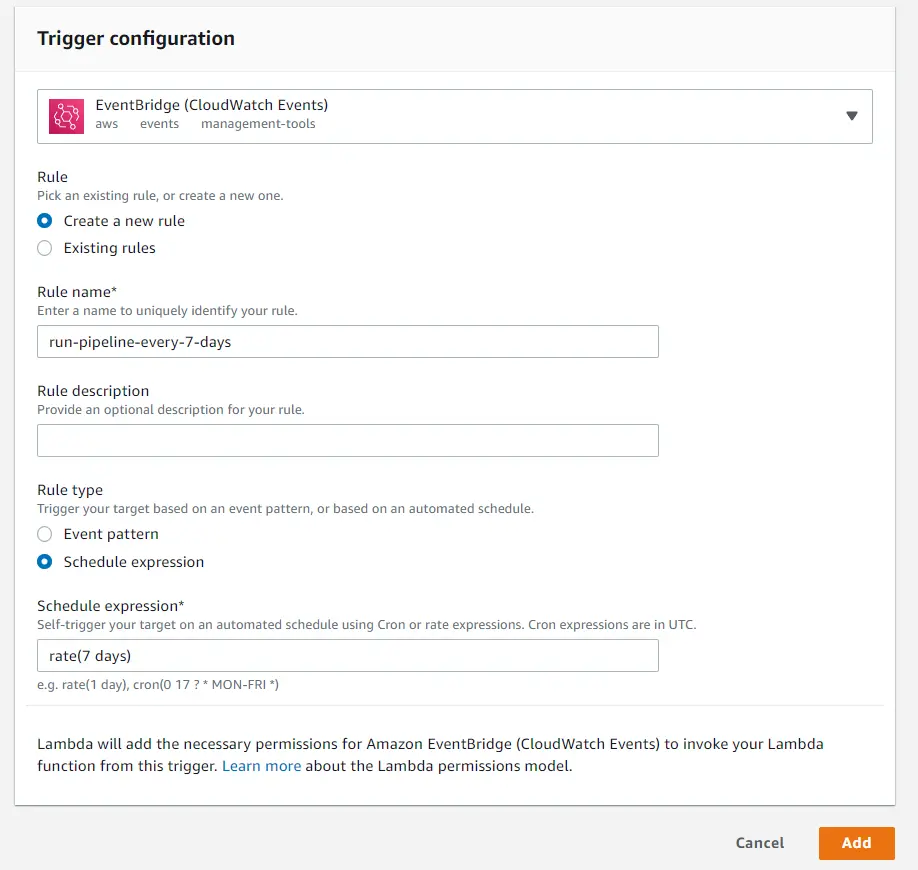
Now the pipeline is all set to re-run every 7 days. If we update the data in the S3 bucket within that time the new data will be used
the next time the model runs. Alternatively, the S3 bucket update itself can also be used as a trigger.
This ended up being a long post, so I won’t go into depth on the ranking model. However, I’ll post
the notebook for the ranking model along with this model on GitHub.
Next Steps
In part 3 I plan on automating the model endpoint deployment. In this section it would be easy to add an always up endpoint at the end of the pipeline to deploy the model. However, I don’t want to pay for an always up endpoint for an API that is not being used. In part 3 I’m going to look into cost efficient ways to deploy the endpoints then add that to the pipeline. Then I’ll set up an API to access to the model through an API gateway and AWS lambda.