Recommendation Systems With TensorFlow Pt 1
Oct 24, 2021
Part 1: TensorFlow Recommenders (TFRS) + AWS Deployment
Colorado ranks in the top 10 of all states for the greatest number of breweries per capita. With so many options, it can be hard to choose which craft beers to try next. I try to tackle this problem by creating a beer recommendation system for Colorado beers in this project. There will be at least two parts to this project, creating the models + hosting them, and developing the frontend and productionizing the AWS deployment. In part one, I walk through creating the models using the TensorFlow Recommenders library, which helps simplify data prep, model creation, training, evaluation, and deployment. Then, to host the models, I’ll create a simple SageMaker endpoint to host the models. In part two, I’ll build a frontend and improve the deployment of the models. Tentatively in part three, I’ll see if I can use something like AWS Rekognition to read beer labels and return their ranking.
Recommendation Systems – A Brief Overview
The end goal of a recommendation system is to rank items based on their relevance to a user. Items are filtered based on their relevance to other users (collaborative filtering) and based on the various properties of the items themselves (content filtering). For example, in collaborative filtering, all the beer rankings by other users are used in recommendations. In content filtering, properties of the beer, such as the style or alcohol content, are used in the recommendations.
The models for recommendation systems also take two forms retrieval and ranking. Having two models maximizes performance because the retrieval model is simpler but faster, and the raking model is more accurate but slower. The ranking model only looks at the items generated from the retrieval model. In this project, I create both a ranking and retrieval model.
I would highly recommend going through google’s course if you are interested in learning more: Google ML Recommendation Course
Model Creation + Walkthrough
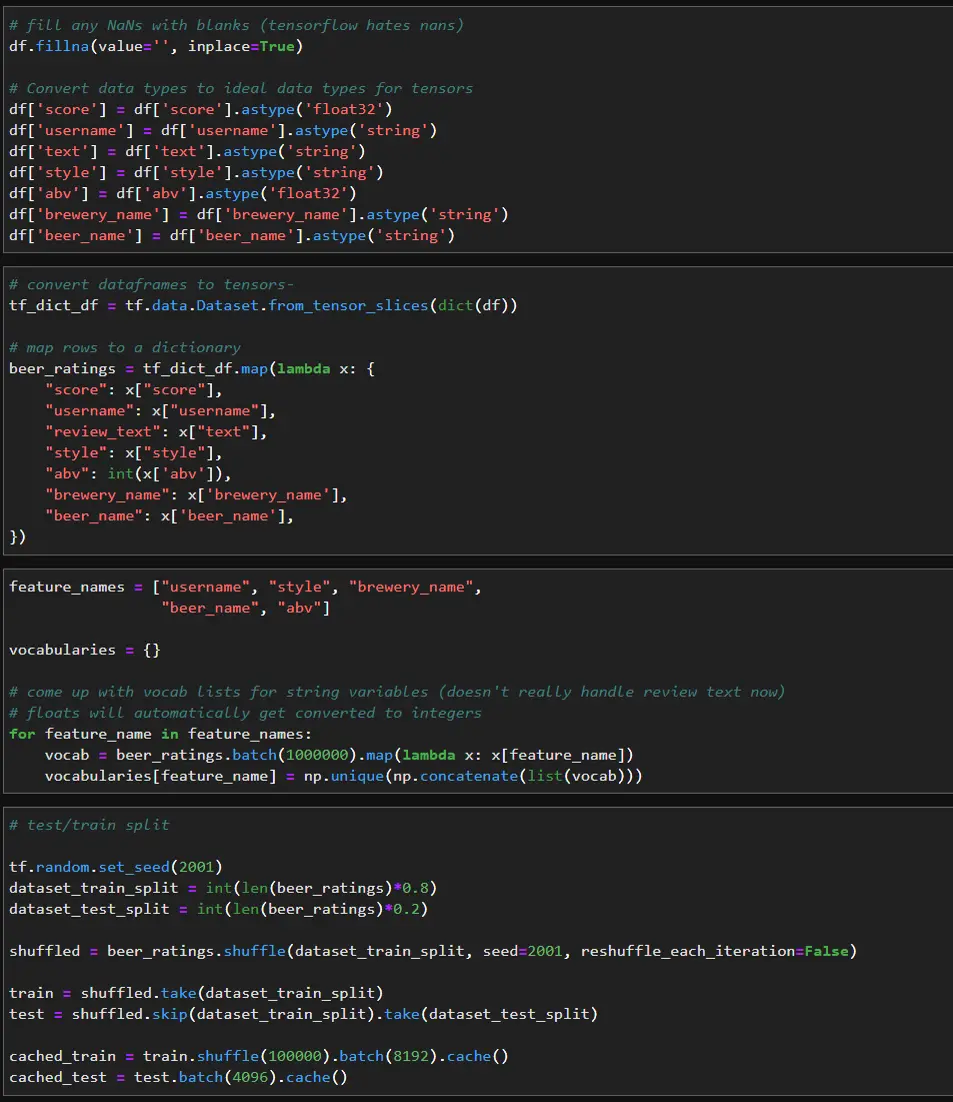
To create my models, I used the Beers, Breweries, and Beer Reviews dataset on Kaggle. With over 9 million reviews, this dataset had enough beer reviews that I could filter down the dataset to only look at breweries based in Colorado. Full Kaggle Dataset
I added 18 of my own beer reviews to the “reviews.csv” file to make predictions for myself. To keep things simple, I only use score, text (text for the beer review), style, abv, and brewery name as features. I host the combined and filtered the datasets in the “final_reviews.csv” file on AWS S3, so you can download the file and follow along if you would like.
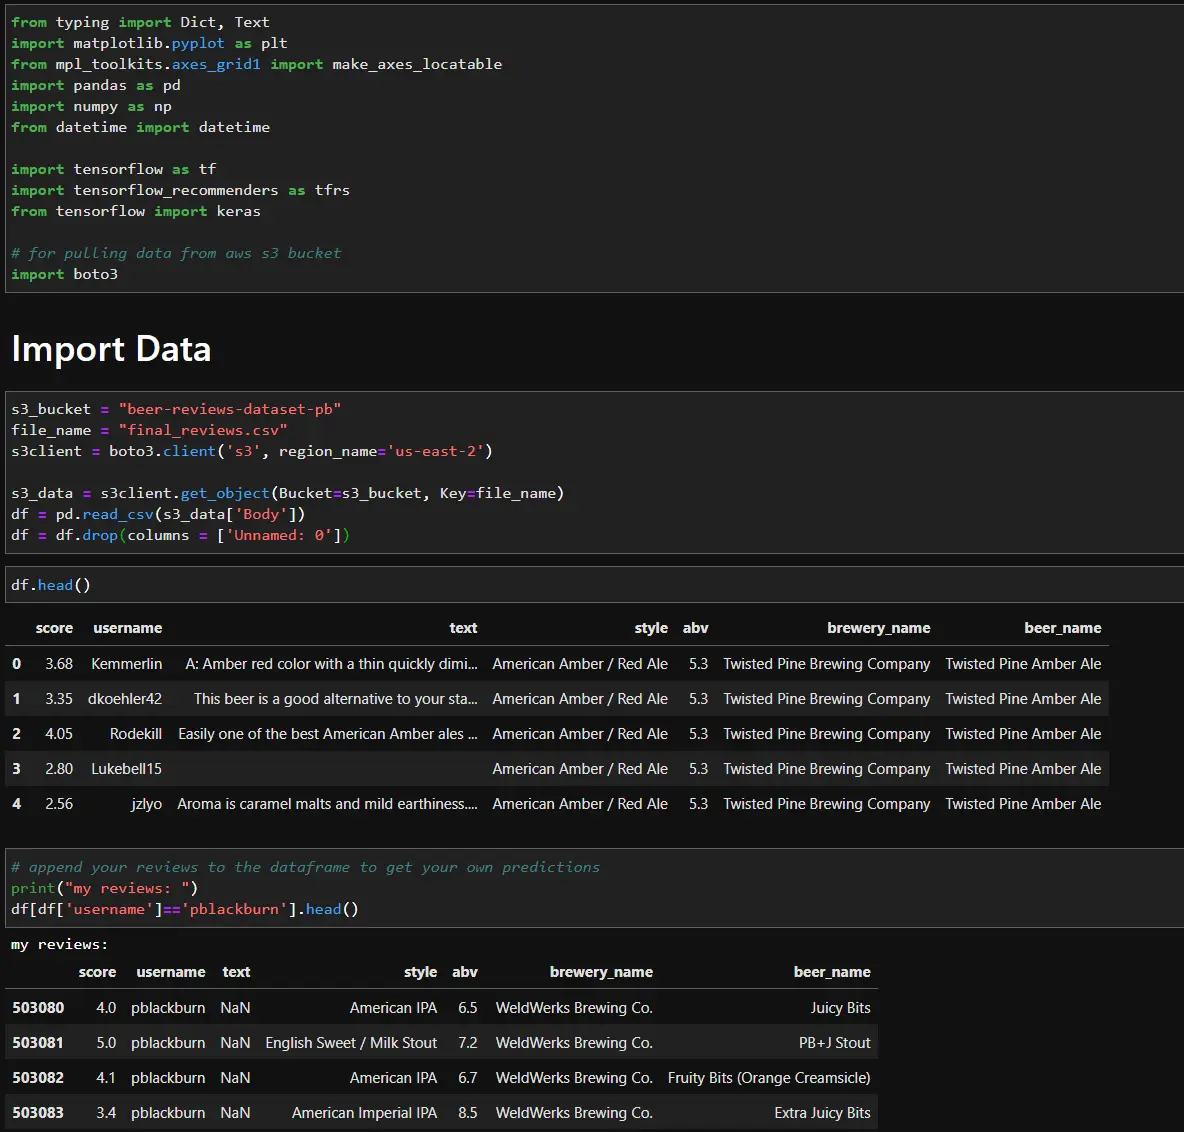
For collaborative filtering I got much better results when I only looked at users who had reviewed 10-100 beers.

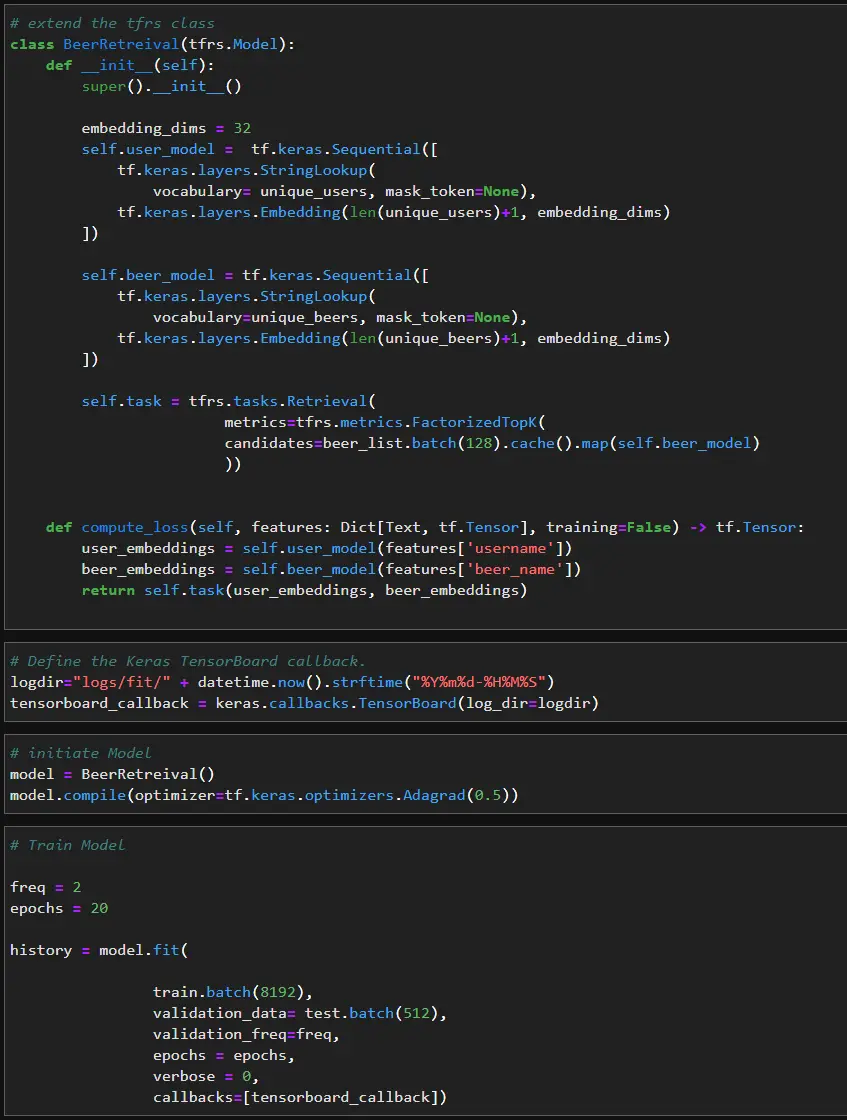
Retrieval
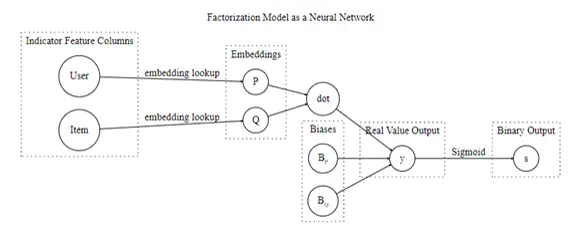
First, I’ll create the retrieval model that returns hundreds of beers that might be relevant to me. Matrix factorization is a popular technique used for retrieval and can be defined by a shallow neural network model. I’ll use TensorFlow Recommendations to easily implement matrix factorization.
Data prep:
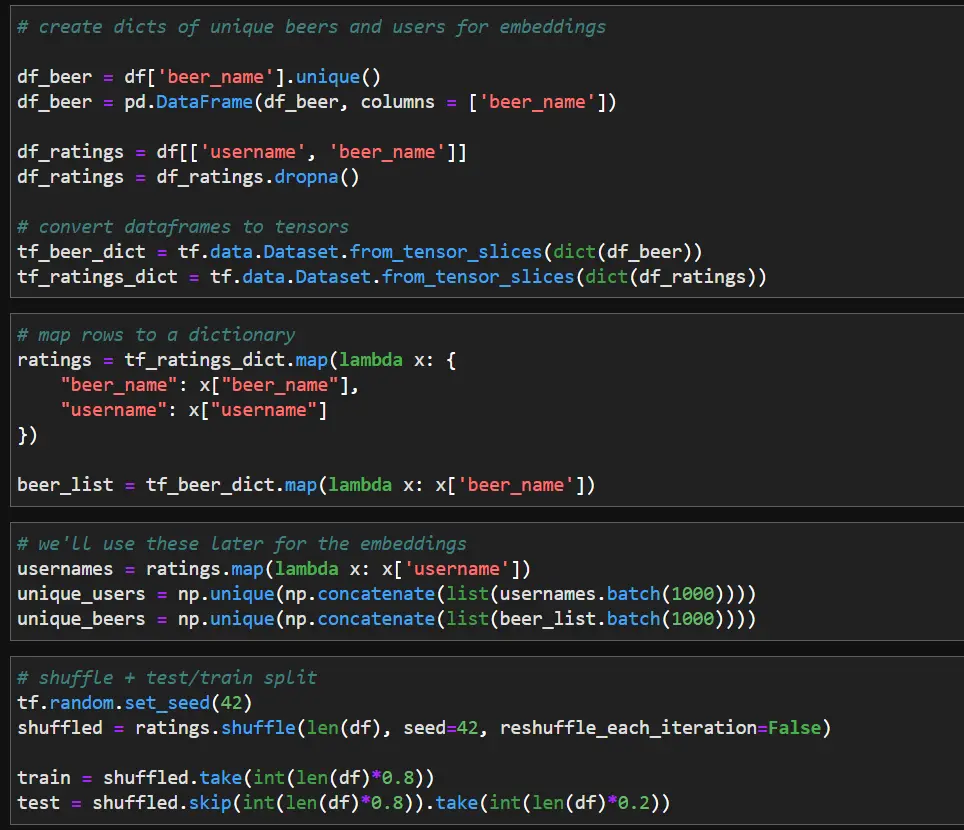
- Convert Pandas DataFrame → TensorFlow dataset
- Map to dictionary format
- Define unique users + beers for embeddings
Model definition:
Next, we can define the model by extending the tfrs class. I create two embedding layers, which are passed to the FactorizedTopK layer. The FactorizedTopK layer computes the metrics for the top K candidates. Compiling and training the model works just like any other TensorFlow model. I use tensorboard to examine the model, but using tensorboard is optional
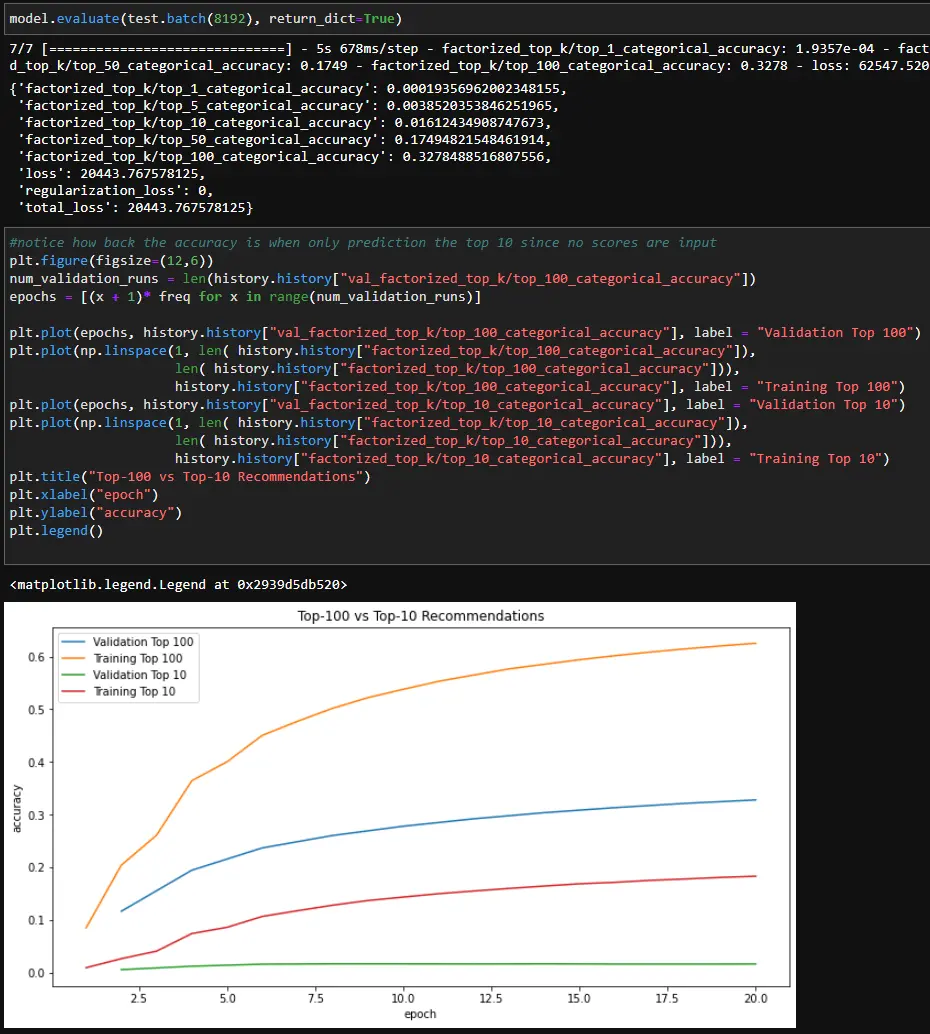
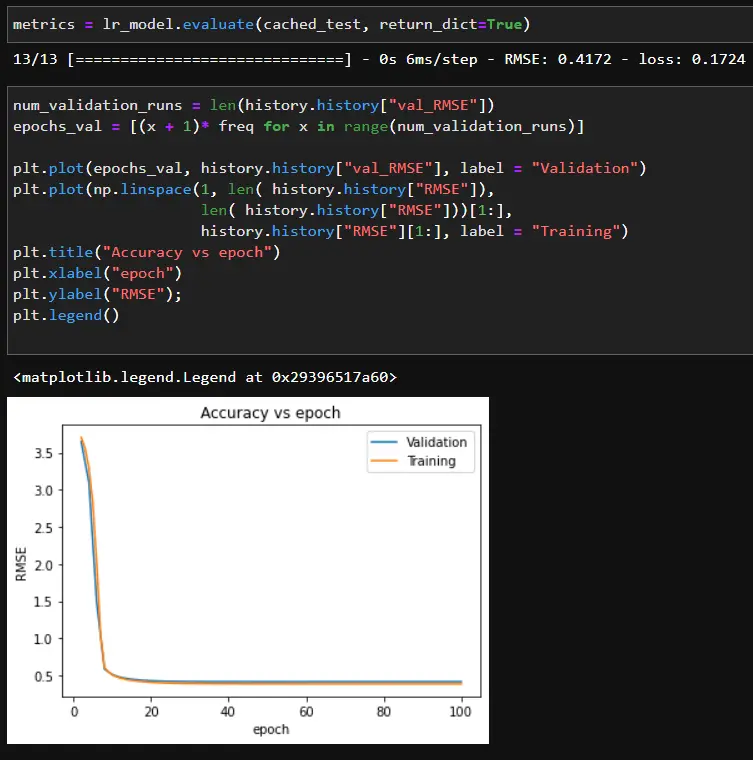
Then we can examine the model to see how well it return relevant beer reviews. You’ll notice the top 1-10 retrieval accuracy is very low, but the top 50-100 retrieval accuracy is somewhat better. We could spend more time tuning + adding features. However, in the interest of keeping things simple, we will move on using the current model.
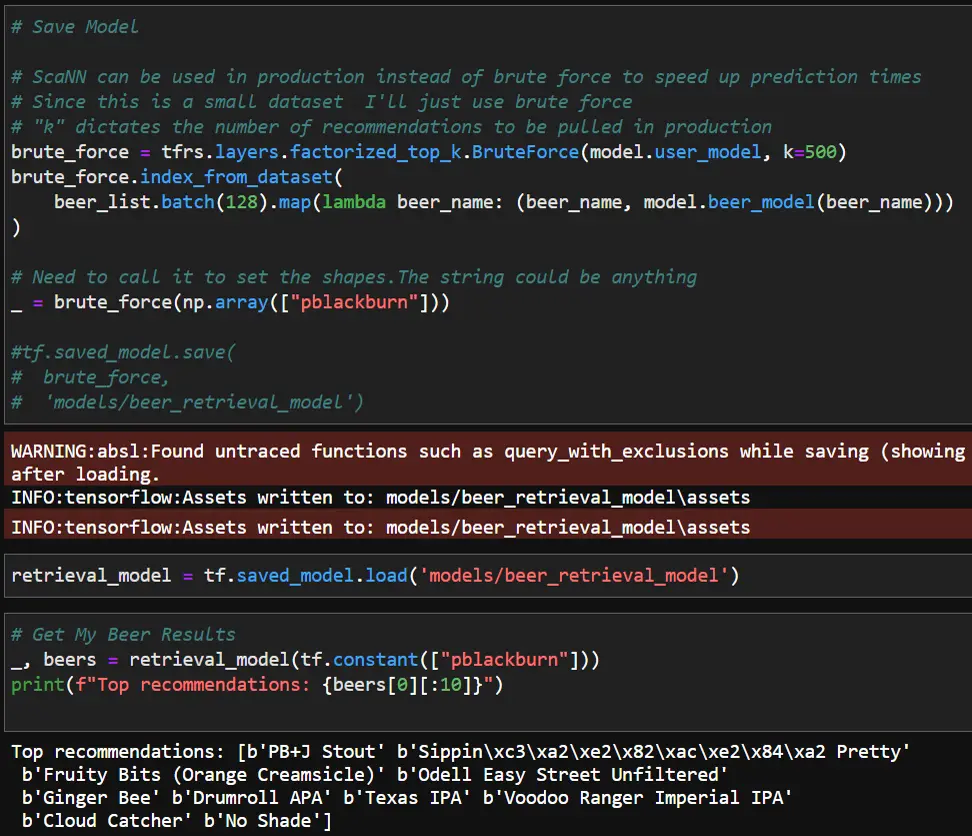
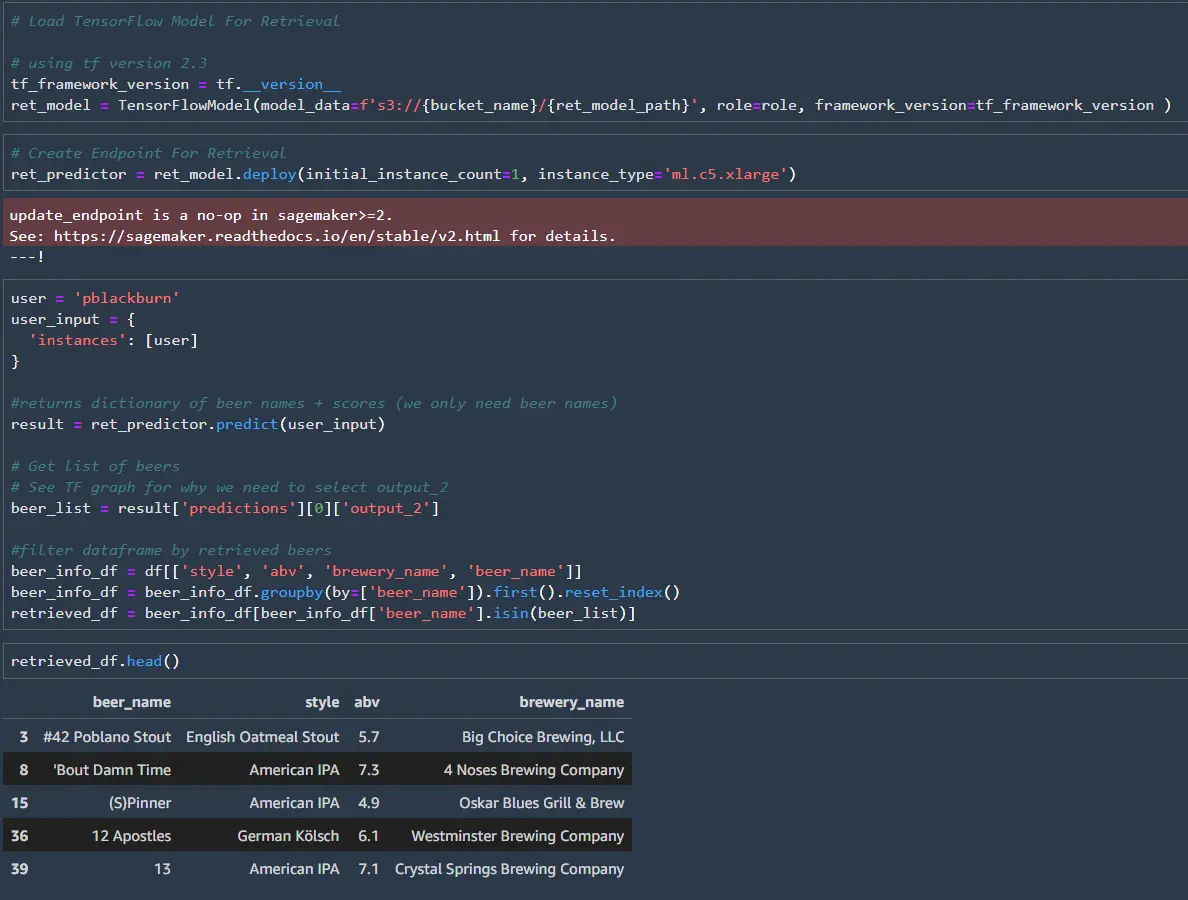
Lastly, we need to save and test the retrieval model. To search the output from the retrieval model we can use the BruteForce method since the dataset is small. In a production environment, the ScaNN library should be used for increased efficiency. Also, when I was looking into using ScaNN I found that it only runs on Linux, so you’ll need to spin up a Docker container to use it on Windows.
After the model has been trained, you can re-load it and test it. Note that “k” value dictates how many items will be retrieved from the model.
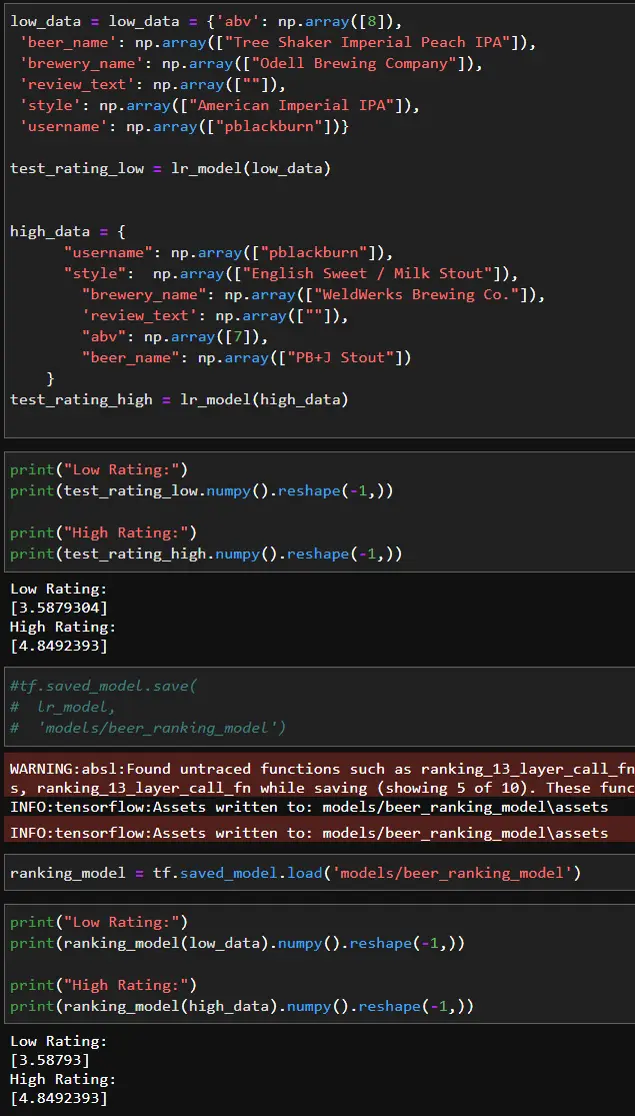
Ranking
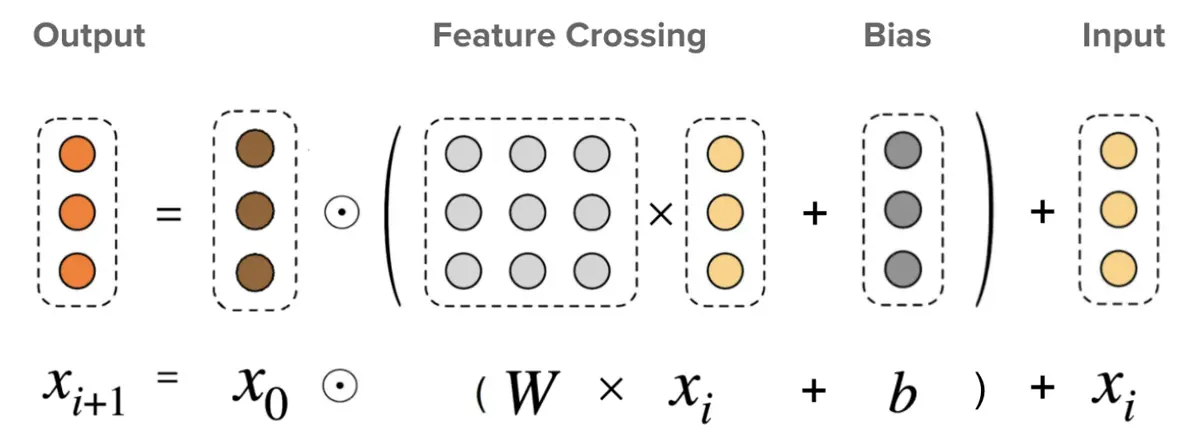
Now that we have narrowed down the list of potential candidates from the retrieval step, we can fine-tune our predictions with a ranking model. For the ranking model I chose to use a deep and cross network (DCN). DCNs attempt to capture feature crosses or combinations of two features to improve the predictions. For example, a particular brewery may specialize in a specific style of beer, and beers in that style from the brewery might be ranked higher.
More in depth information on DCNs can be found on TensorFlow’s website:
TensorFlow Recommenders DCN Example
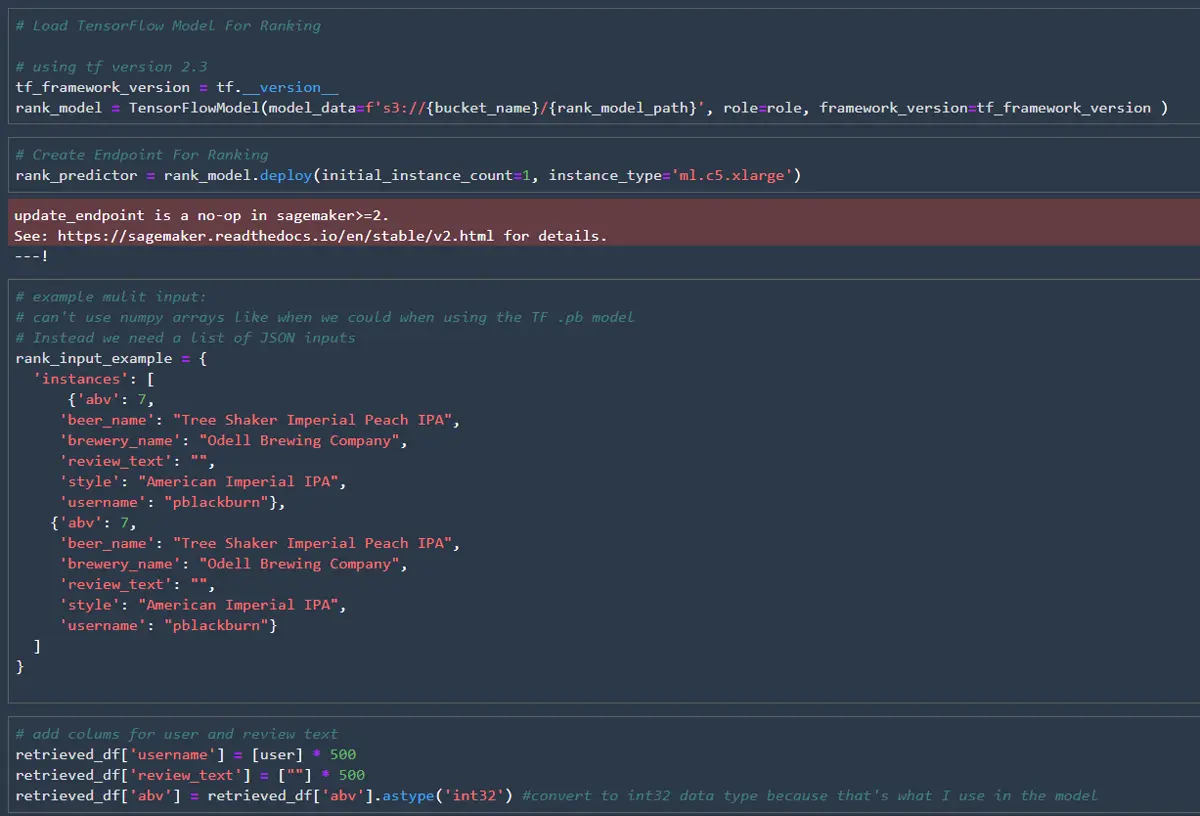
We can add additional features for ranking such as the beer review text, beer style, alcohol percent, and brewery name. In this case, I only have features related to the beers, but if features related to the users were available, we could add those as well. Again, I’ll convert the pandas dataframe into a TensorFlow dataset then map the rows to a dictionary. We’ll also need to get the unique values for the input values as well.
For this model I use a stacked DCN as described in the TensorFlow docs. The features are first embedded like in the retrieval model, but then they are passed to a cross layer and then into a deep layer. The use_cross_layer parameter can be set to False to analyze the model with and without the cross layer. The number and size of the deep layers also can be optimized using the deep_layer_sizes parameter.
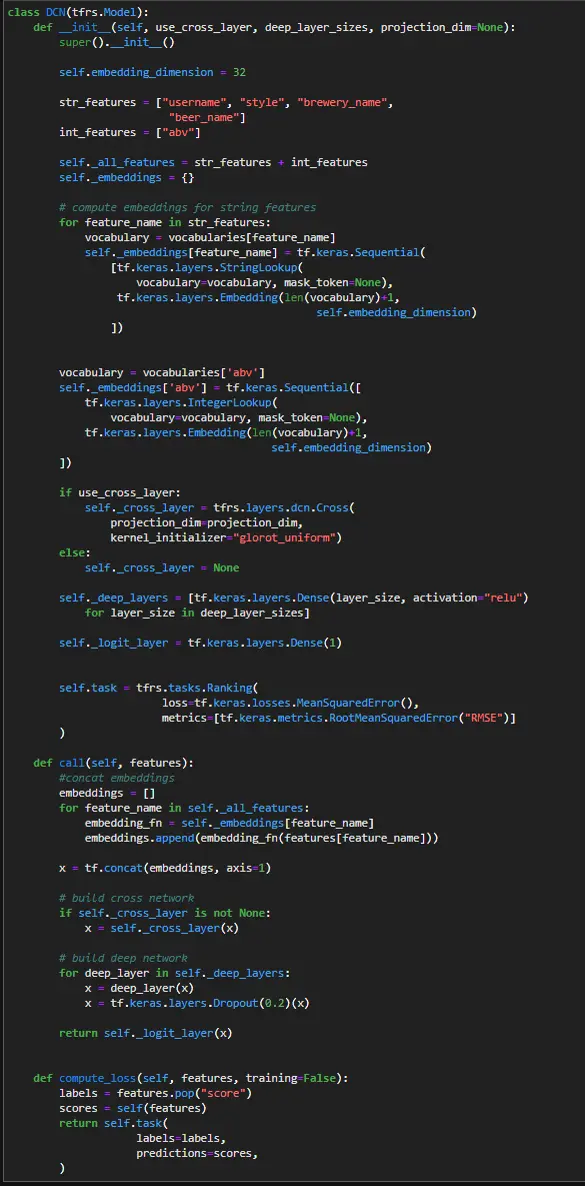

When training the model, it would overfit very quickly, so I had to turn the learning rate down to 0.0001 and add in dropout layers.
We can check what the model has learned with the feature crosses by looking at the Frobenius norm of each weight matrix in the DCN.
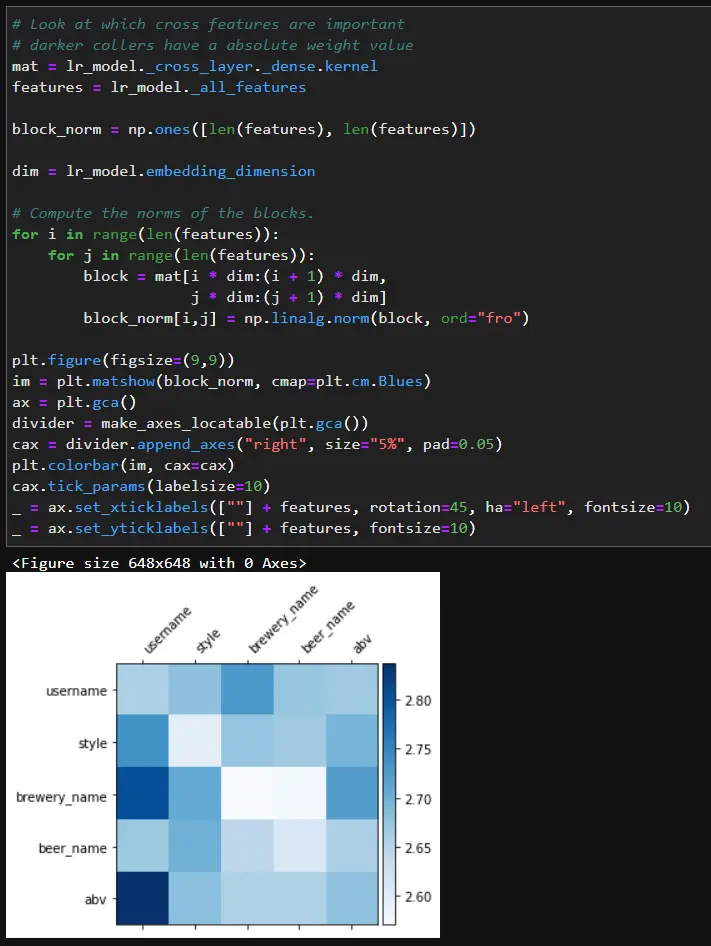
Based on the matrix, certain people may prefer certain breweries or beers with high or low abv. Once we are happy with the results, we can save the model.
Putting It All Together
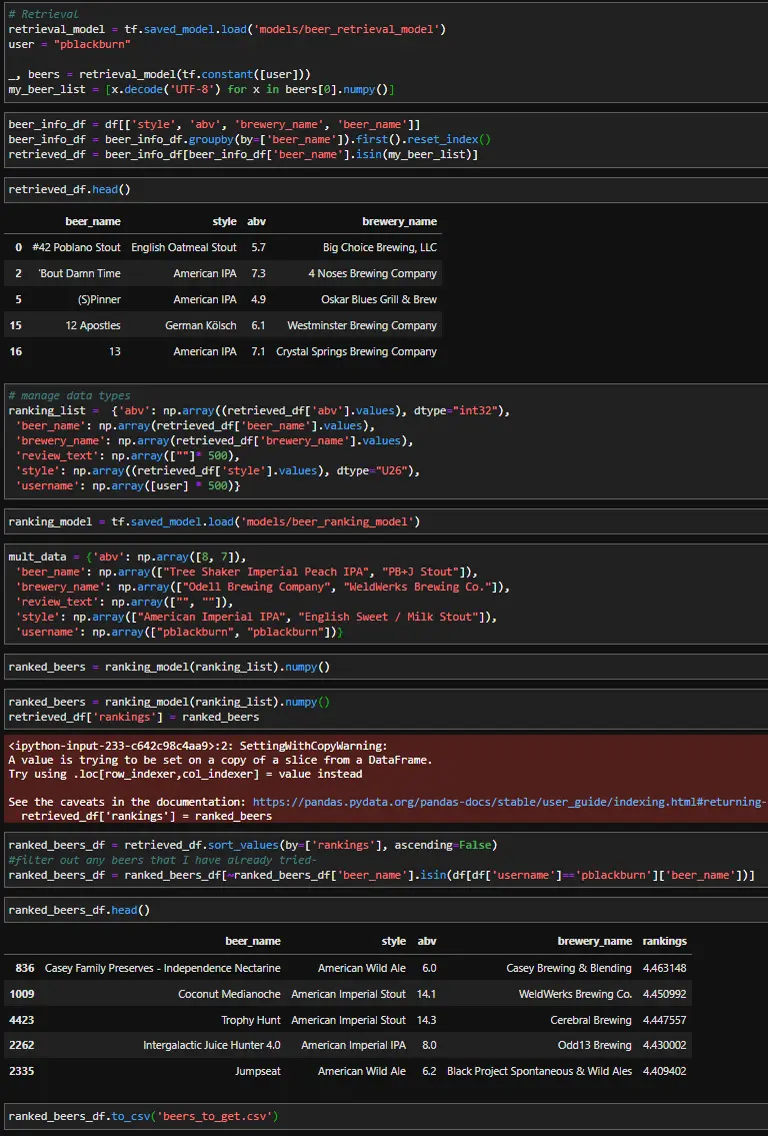
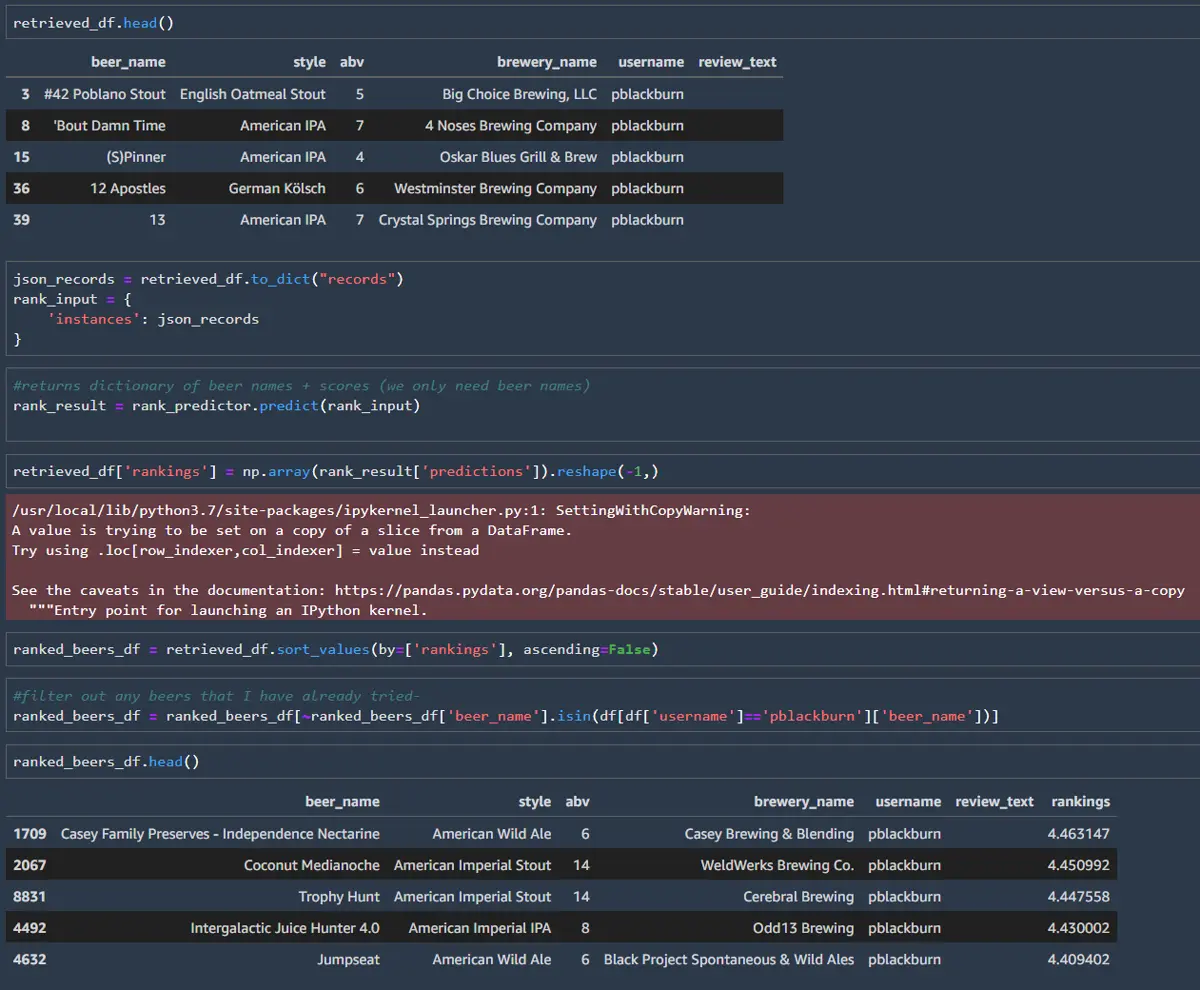
Now that both models have been created, we can test them out. First, the retrieval model will search for the top 500 most relevant beers for me, then the ranking model will decide which beers to recommend. Once the top 500 beers are returned, we need to look up the additional features for each beer to use as inputs in the ranking model. Last, I’ll filter out any beers I’ve already tried since I want to try something new.
Since this dataset is older not all the beers are still being produced, and some of the breweries are somewhat local. However, After reviewing my recommendations, it looks like there are a few beers that I can try.
Deploying To SageMaker
Finally, I’ll export the models to SageMaker and create an endpoint for hosting the models. In part two, I’ll dive more into productionizing the models and improving the hosting. For part one, I’ll briefly go over setting up a basic SageMaker endpoint. Hosting the models will allow them to be accessed by a frontend, so the models can be accessed at a brewery or liquor store to help the user select their beer.
Model export
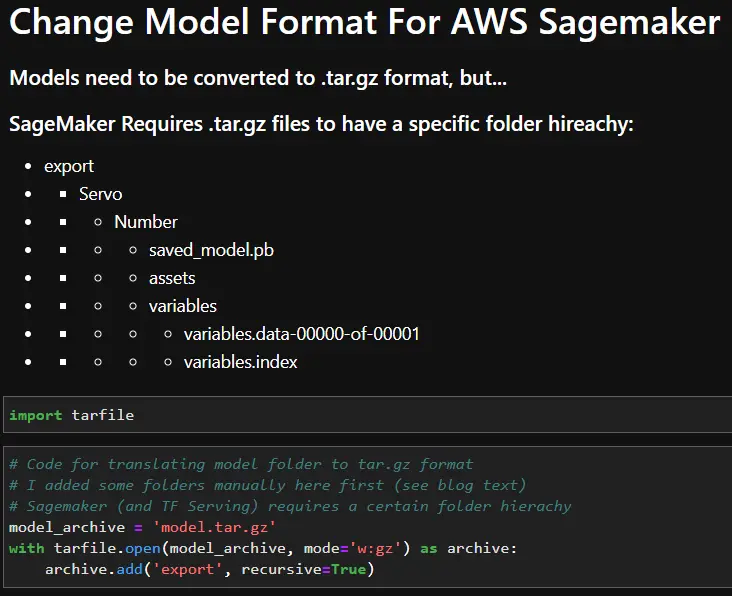
Before uploading the TensorFlow models, they will need to be translated to a format that SageMaker can read. By default, TensorFlow saves the models in a model folder that contains a “saved_model.pb” file, an assets folder, and a variables folder. To upload the models to SageMaker, the model folder must be renamed as an integer and placed inside an “export” and “Servo” folder. The file structure is shown below. Once the file structure has been updated, everything in the “export” folder can be saved in a model.tar.gz folder. This model.tar.gz file is what SageMaker will read to use the TensorFlow file. The code snippet below shows how to convert the models into a model.tar.gz format once the folder hierarchy has been created. In this case, I manually created the folder hierarchy first.
SageMaker setup
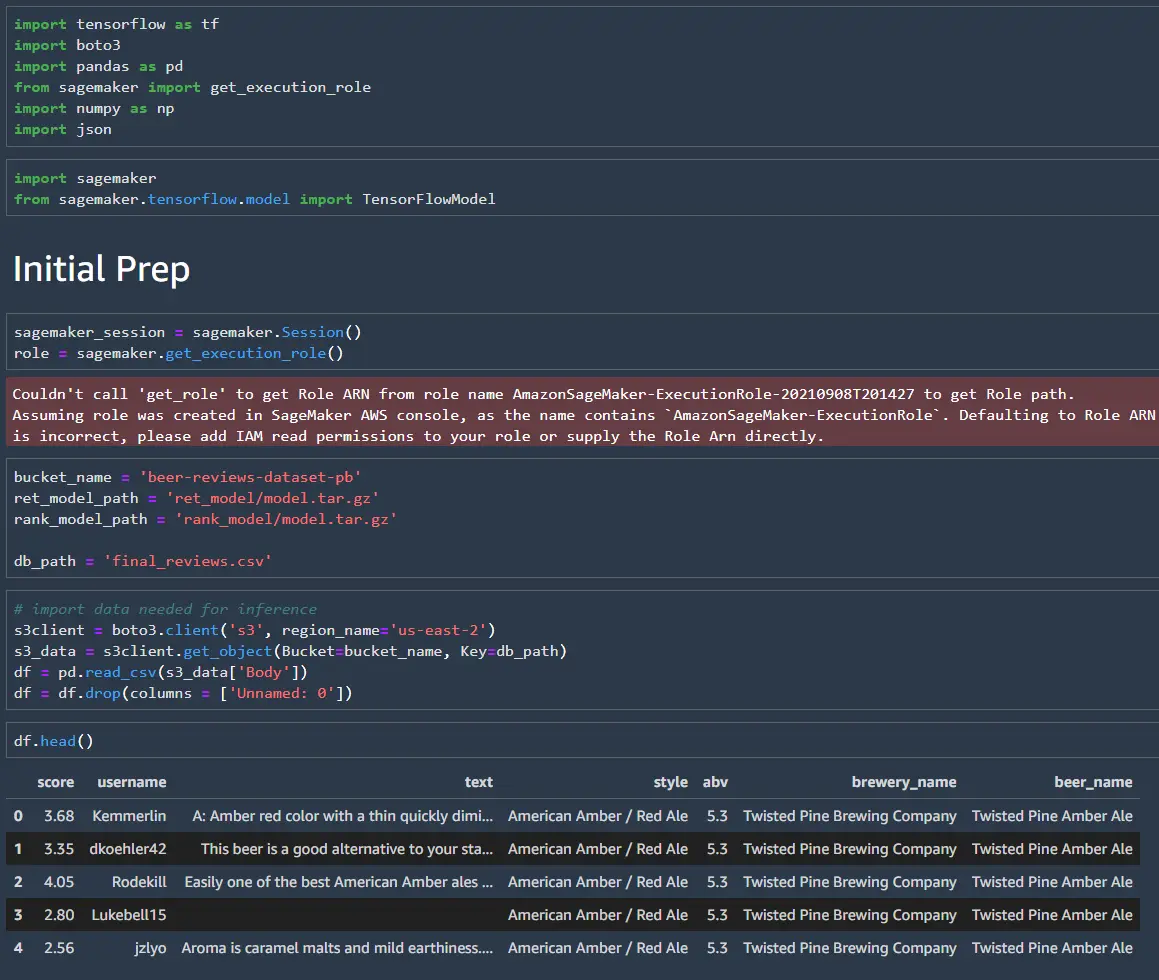
Upload the .tar.gz files to S3, and we can get started with SageMaker. First, set up the SageMaker session and role. Next, define the bucket name, the dataset path, and the path for the two models in .tar.gz format.
Once the models are in the correct format, it is straightforward to load them and create the endpoint. Like before, the modes will return the top 500 matches, and we will use the matches to pull the data for the ranking model.
I’ll set up a second endpoint for the ranking mode in this post, but both models could share an endpoint. The SageMaker endpoint wants the data to be JSON readable for the ranking model, so we can’t use NumPy arrays. Instead, we can convert the pandas dataframe into a dictionary.
Finally, save our predictions back to S3 and shut down your endpoint. Endpoints can be expensive if you don’t forget to turn them off. In production, a frontend would call the endpoints instead of saving the outputs to a CSV file. The top X ranked beers could then be shown to the users. In part 2, I’ll dive into productionizing the current models + endpoints. For now, I will use the CSV file to test out some of the recommendations.
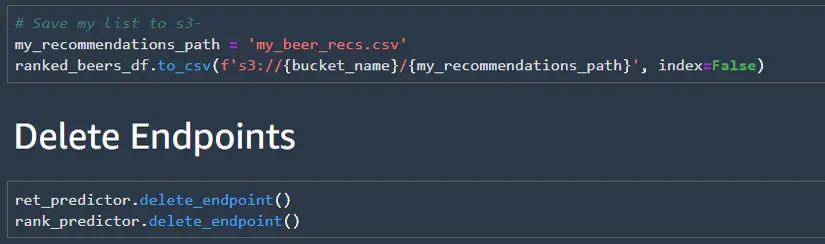
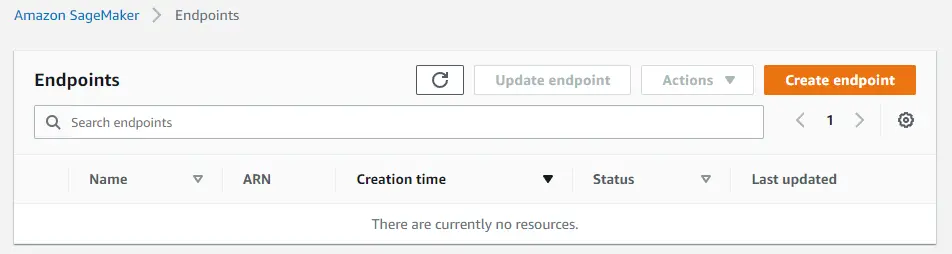
Don’t forget to double-check that you have no endpoints still running in the SageMaker console.
My Recommendations
Now for the best part of this project- testing the model’s recommendations. I went through my predicted recommendations and found a few beers at my local liquor store. I stuck with larger brands like Odell’s and New Belgium, since I was fairly certain I could find them at the store.
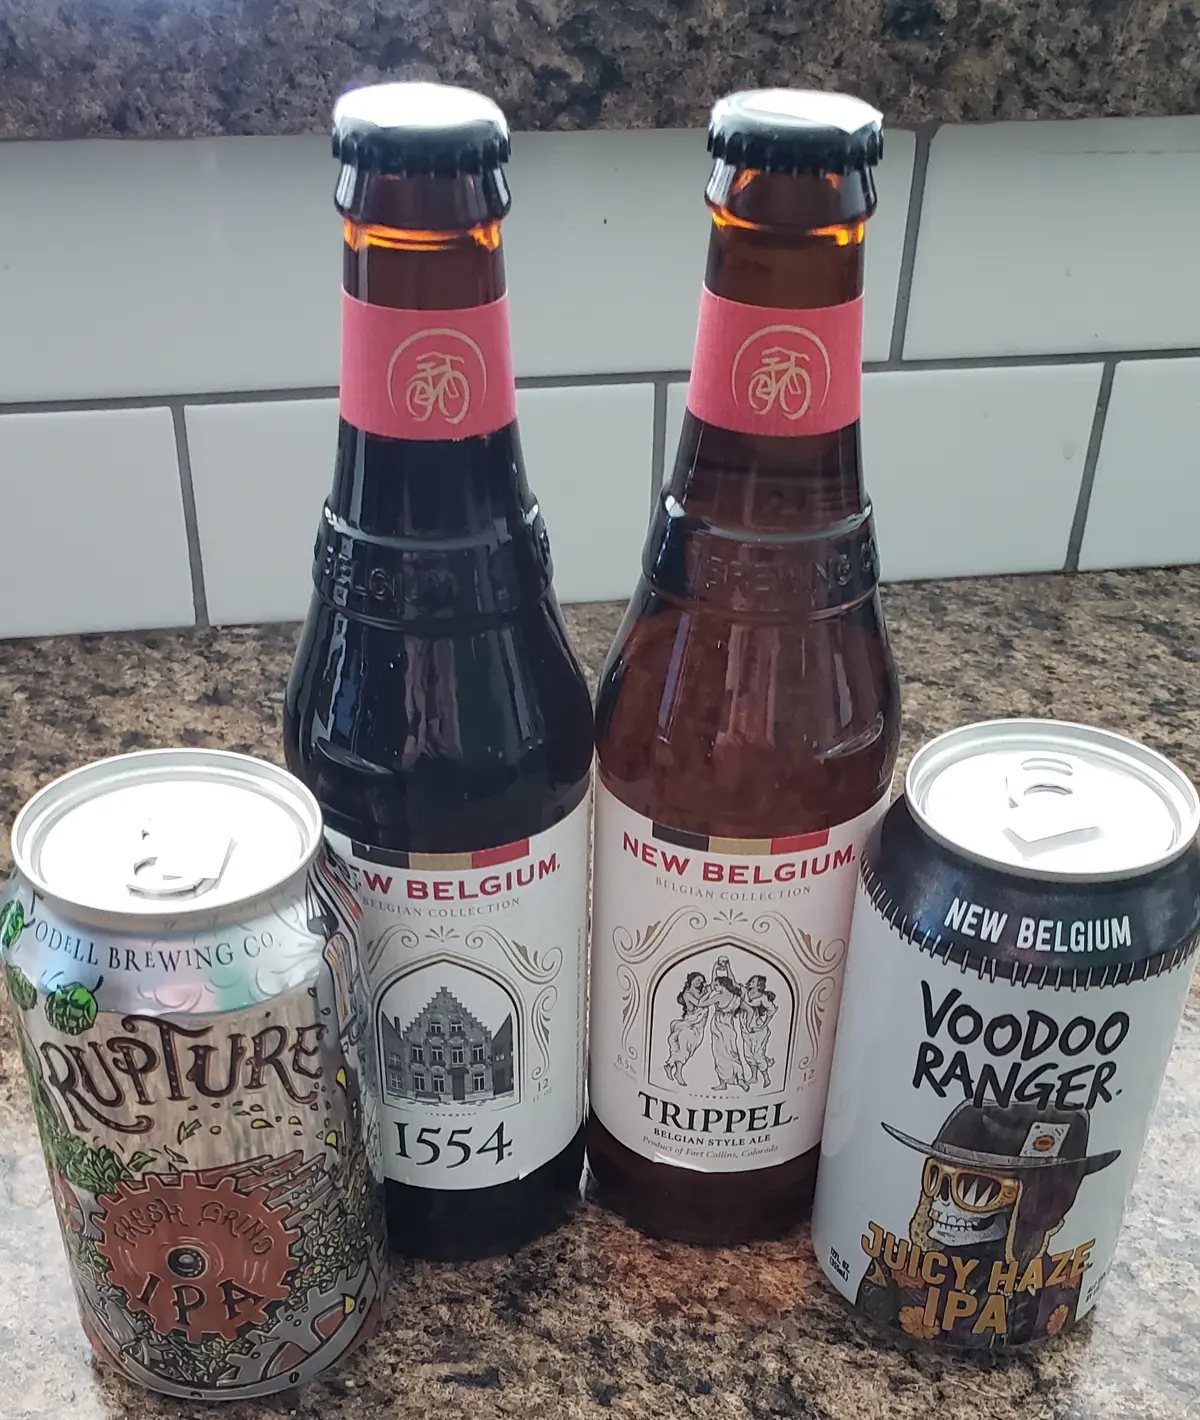
Overall, the predictions were close to my actual rankings except for the Voodoo Ranger Juicy Haze IPA. The table below shows the model's predicted score and my actual score. I typically don’t go for unfiltered beers, so I might be somewhat biased against the Voodoo Ranger brew. The Rupture beer was my favorite of the four having a full, hoppy flavor. All of the ratings are out of 5.

- Rupture was my favorite (full, hoppy flavor)
- Voodoo Ranger Juicy Haze IPA was ranked too high by the model (not my style)
Next Steps
Having my predictions locally is great, but I want to access to my beer recommendations from anywhere. In the next part of this blog post, I’ll set up a frontend for my recommendations. Also, I’ll look into using SageMaker to update the models as I rank more beers.