Pico Pi — Homelab Server Monitoring
Feb 18, 2026
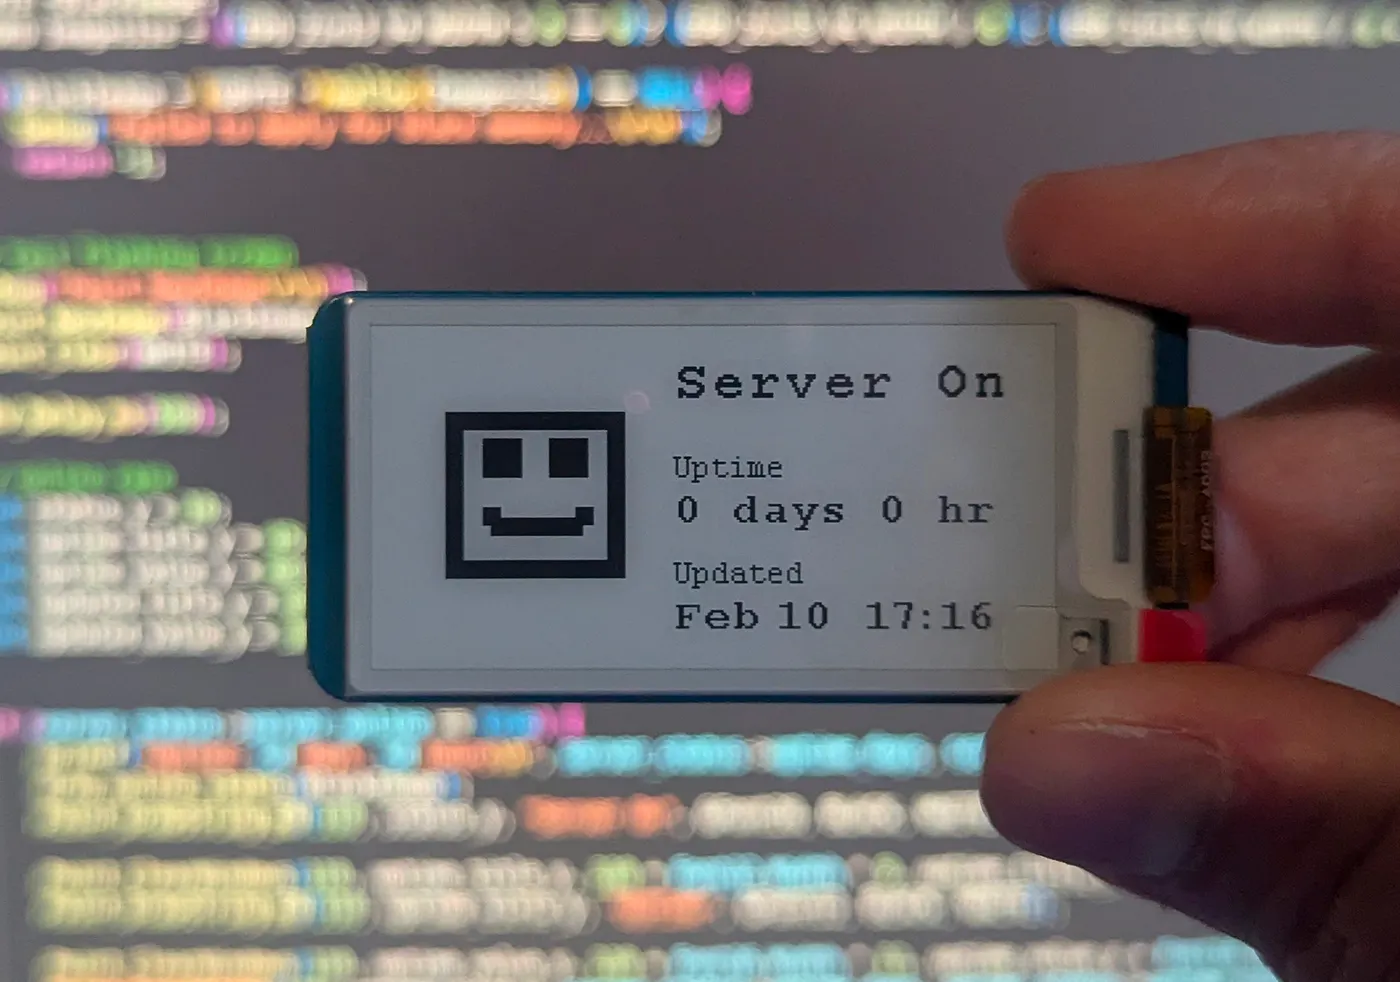
I’m hosting my personal site from my homelab server, and despite having a UPS with NUT (Network UPS Tools) setup, it has gone down a couple times. A normal approach to this problem would be to setup text or email notifications. However, I want to host my solution locally on my home network instead of relying on a 3rd party SaaS or hosting service.
Additionally my home server runs non-critical workloads, like my personal site, so if it goes down in the middle of the day I won’t address the issue until after work. A standalone microcontroller with a lower power always on display that I can place somewhere in my house with high traffic would be ideal. The Pico Pi W microcontroller with a eink display fits the bill. The eink display doesn’t need power to maintain an image, which can be leveraged to achieve a very long battery life.
I’m setting one more constraint for myself for this project, I’ll be using C instead of micropython. I use python in my day job and most of my projects, but I’ve been interested in learning C to better understand both computer fundamentals and Python.
All of the code for this project is open source on my github — https://github.com/PrestonBlackburn/eink_homelab_monitor
The parts you’ll need for the project are listed below:
- Pico Pi W
- Eink Display
- Battery Bank (Optional)
Project Concepts
There are a few key concepts that will help us understand how to setup our pico pi and eink display. When programming on a PC, especially in python, most of the hardware is abstracted away, while programming a microcontroller like the pico pi requires more explicit control over the hardware.
- Eink display mechanics
- Formatting images as bytes (optional)
- Wifi on the pico pi and networking
- Sleep and clocks
This assumes you’ve already gone through the Pico Pi C SDK docs for basic operation
Eink Displays
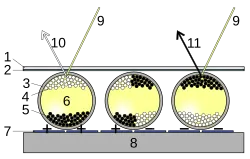
E-ink displays are cool because they don’t require power to persist an image making them great for low power applications. They work much differently than LED screens. Instead of emitting light when a current is applied, E-ink uses charged colored particles suspended in transparent oil to display images. When a current is applied to the micro-capsules full of particles, the charged pigments will move to the respective ends of the capsules and display black or white. Since the movement only needs to happen once the image persists when there is no current.
You can checkout a slowmo of the cells changing color here — eink_video
There are also programming implications since the eink display is physically moving particles instead of just passing a current like with LEDs.
The capsules can get “stuck” in a position resulting in a “burn-in” like artifacting between images. From time to time we want to invert the colors on the screen to prevent this. Also when updating a smaller section of the screen, we need to clear the segment of the screen before updating the image. Since the particles are in place, if we directly apply the new image it would be superimposed over the existing image.
Displaying Images (Optional)
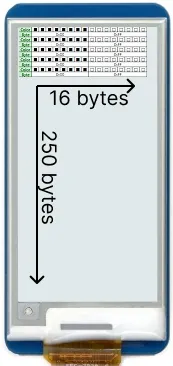
If you want to display images on the eink display, then you must understand the protocol that the Waveshare (or your manufacturer) eink module supports. The module expects you to send images as an array of bytes where each bit represents a black or white pixel.

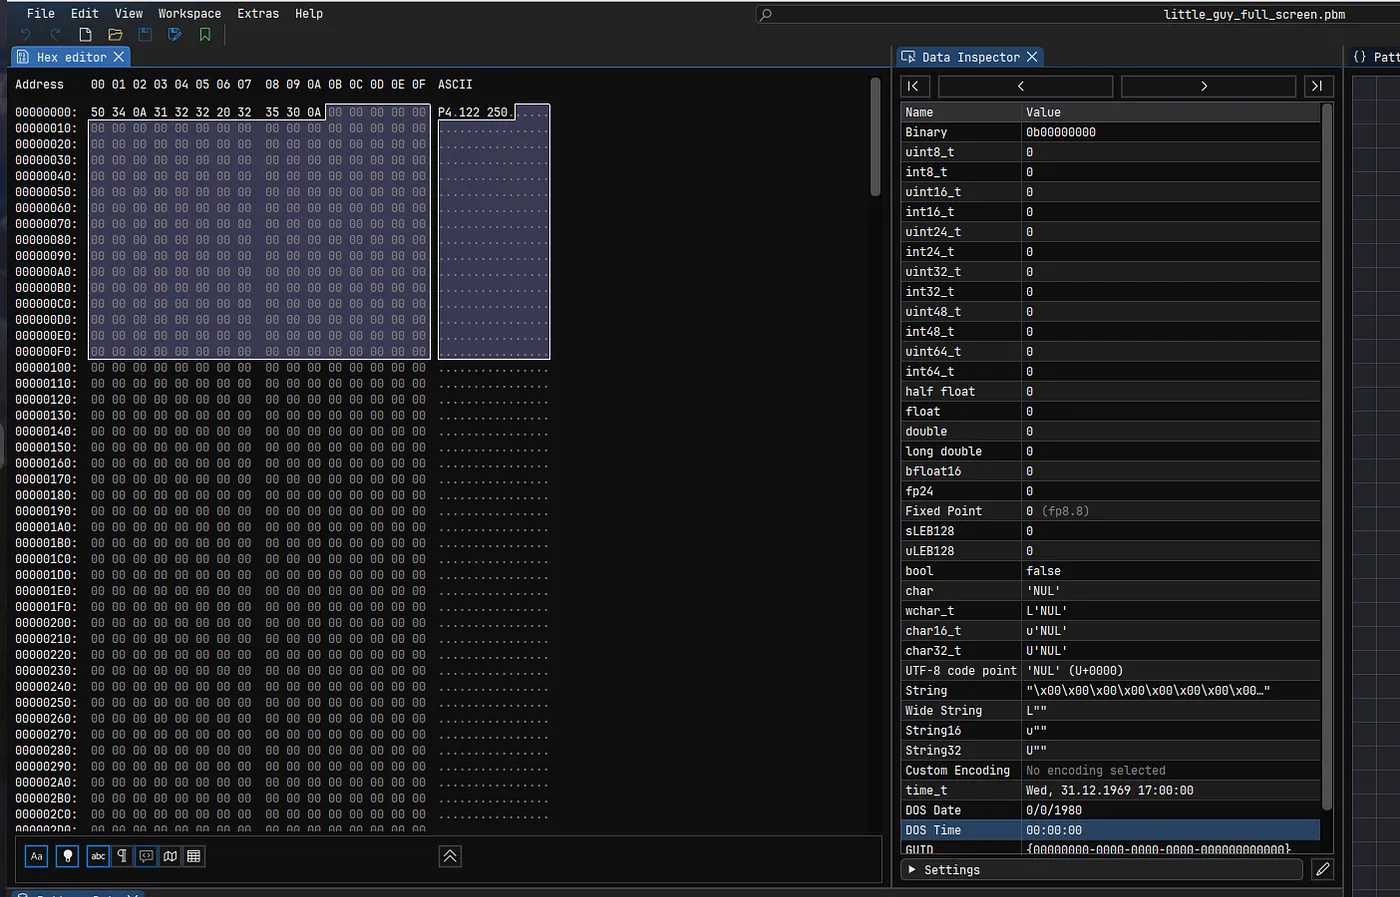
So for our 250 X 128 pixel display (2.13 inches) we’d expect to have 4000 bytes (4000 bytes x 8 pixels per byte = 32K pixels). In the image below you can see that the display is row-oriented where each row has 16 bytes (128 pixels) and there are 250 rows (250 pixels) of height.
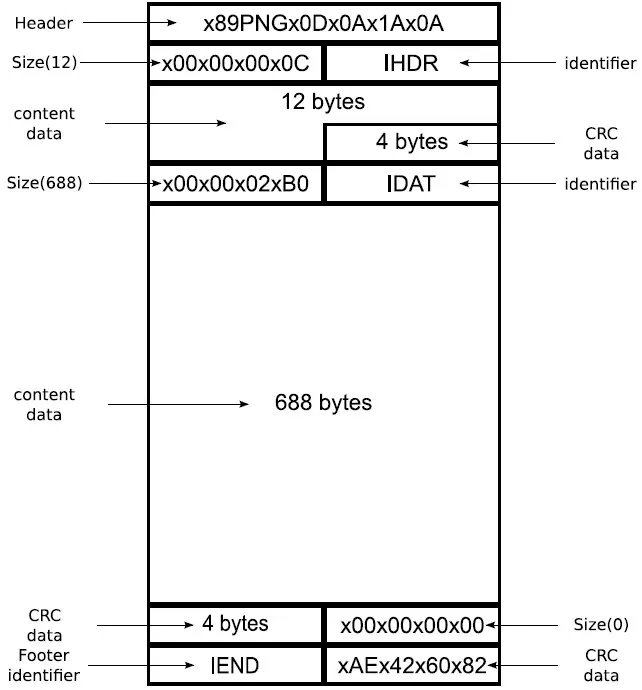
Now that we know how the screen is oriented, we know how we want to format our image for the eink display. However, we have another challenge related to image formatting. Typically we work with images in compressed forms like PNG, JPEG, and WebP, but these images are not the raw pixel values for images.
For example a PNG file has various metadata besides just the pixel data we care about. Plus the PNG may contain RGB and transparency information and not just binary black/white pixel data.
Waveshare does offer an image generation tool, but it looks like it is only for windows, and I don’t love the idea of running random Chinese executable (plus I’m on linux).
Waveshare Image Extraction Utility
Instead I wrote a small Python script to do the image conversion. It uses the pillow library to convert any RGB colors to just black/white then saves the image to the PBM file format (portable bitmap file format). The PBM format was actually created in the early 80s and “is a lowest common denominator monochrome file format.”
I found some early web documentation for this format from NASA from 1989 that still holds up -https://oceancolor.gsfc.nasa.gov/staff/norman/seawifs_image_cookbook/faux_shuttle/pbm.html
PBM format has a short header, and the rest of the file is the exact bytes that we need. To extract the content bytes you could either parse them out, or use a tool like Imhex to inspect and copy out the bytes.
Networking
The Pico Pi W has the main RP 2040 chip and a separate CYW43439 wifi chip. The wifi chip provides the ability to do layer 1 (physical) and layer 2 (data link) activities, like receiving and sending frames over the wifi 2.4 GHz radio waves. For the actual routing and higher level network layers, like http requests, we’ll need the lwIP library, which is a small independent implementation of the TCP/IP protocol suite. It handles the implementation of the IP routing and TCP communication for us, so we can make standard http requests to the site we want to monitor.
Clocks
There are many clocks on the Pico Pi, but for simplicity we’ll lump them into two categories, the RTC (real-time clock) and system clocks. The XOSC (crystal oscillator) is also useful to know about (mainly that it exists) because it provides the base timing reference for the system.
RTC — The real time clock is the clock time as we know it so if you set a sleep interval of 30 minutes the microcontroller knows how long that is.
System Clocks — The main system clocks runs at 125 MHz, and we can slow this clock and others down to conserve power when they are waiting.
Project Code
Now that we know more about our Pico Pi and eink display, we are in a much better position to tackle the coding for this project. Since all of the code is on my github, I’ll just go through the main loop at a high level. The flow ended up looking like:
- Initialize the Eink display
- Initialize the wifi connection (CYW43439 chip)
- Initialize the RTC with the datetime from the google NTP server
- Make a http request to my site’s /healthz endpoint
- Set the server status based on the healthz response
- Paint the eink display with the data from the endpoint
- Sleep for a set interval
- Loop continuously starting at the http request
I’d like to say it was as easy as that, but I’ll talk about some of the challenges I ran into with this setup.
Final Setup and Takeaways
I got tripped up on setting up the deep sleep properly, and wasn’t able to get the pico to wake up properly. I also found out that for the deepest sleep you’ll need an additional external RTC that can send a signal to a GPIO pin to wake up the device.
Without a deepsleep mode the battery life would be very short, maybe around a day, and its obviously not reasonable to charge the monitor every day.
I may try to implement the deep sleep functionality in a future project, but for now I remembered that I had recently replaced several of my kitchen outlets with outlets that include 5V USB chargers. Since 5V can power the Pico, using the outlets means I never need to recharge the pico’s battery. The downside is that I’m more limited on where I can place the pico. For now it works well enough.

One of my goals was to dip my toe into writing C, and in that sense I think this project was successful. CMake is somewhat clearer, and there were a few points where I had to use some pointers and manage memory. In most cases I would take a first pass at the code, try to fix any compiler or logic errors, and only when I got stuck after reading the docs would I use LLM tools to get unstuck.
For future projects I may check out the ESP32 instead of the RP2040 since it has built-in wifi. I think that could simplify some of the setup.
Overall, I think there are a ton of cool uses for microcontroller powered eink displays, and I’m excited to dive more into C and embedded systems.